Introduction: Custom environment set up in BioStudio
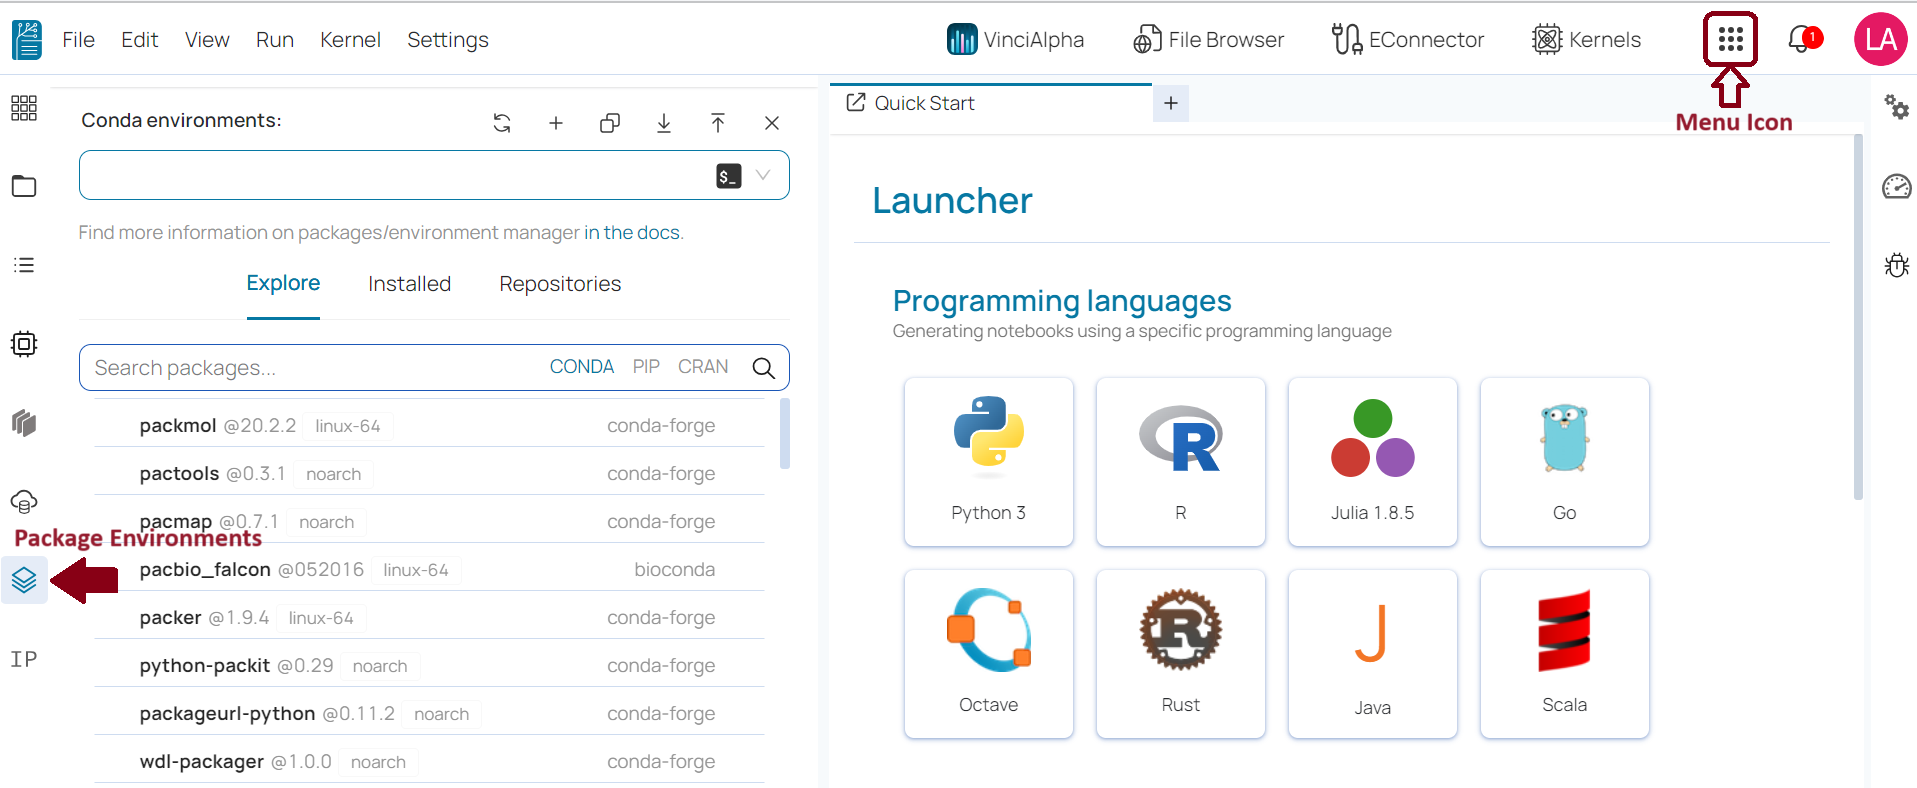
¶Conda Environment Manager 
BioStudio is currently utilizing conda manager. Conda is an open-source package management system and environment management system. A conda environment is a directory that contains a specific collection of conda packages that you have installed.
To access this features:
🔆 Click on Package Environments icon on the left side menu.
– OR –
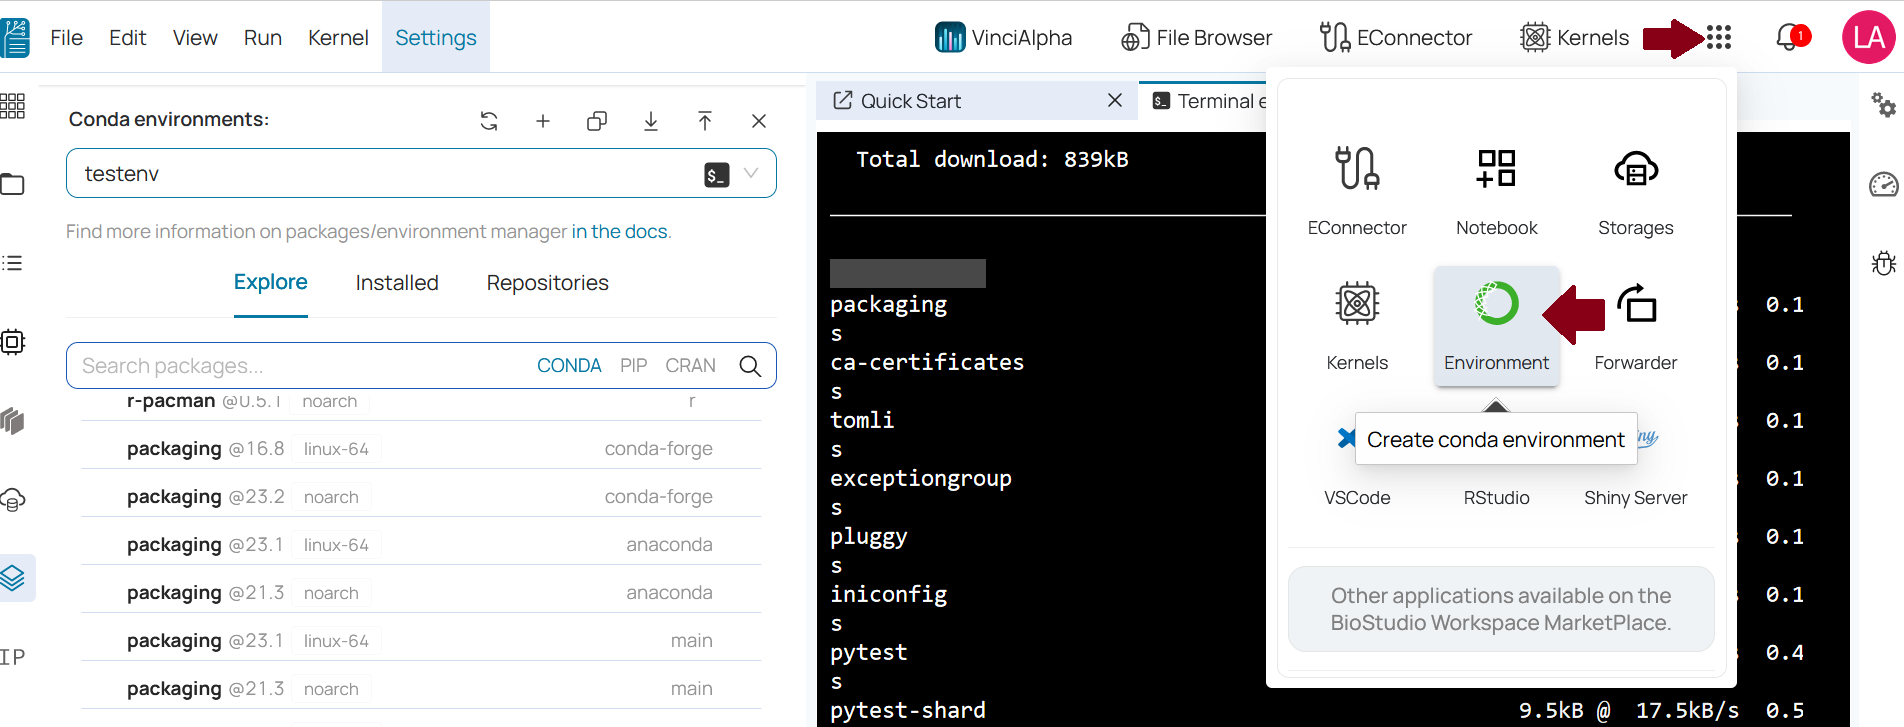
🔆 Menu Icon located at right side on the menu bar.
– OR –
Conda environments utilities can be used based on requirement.

Create new environment 
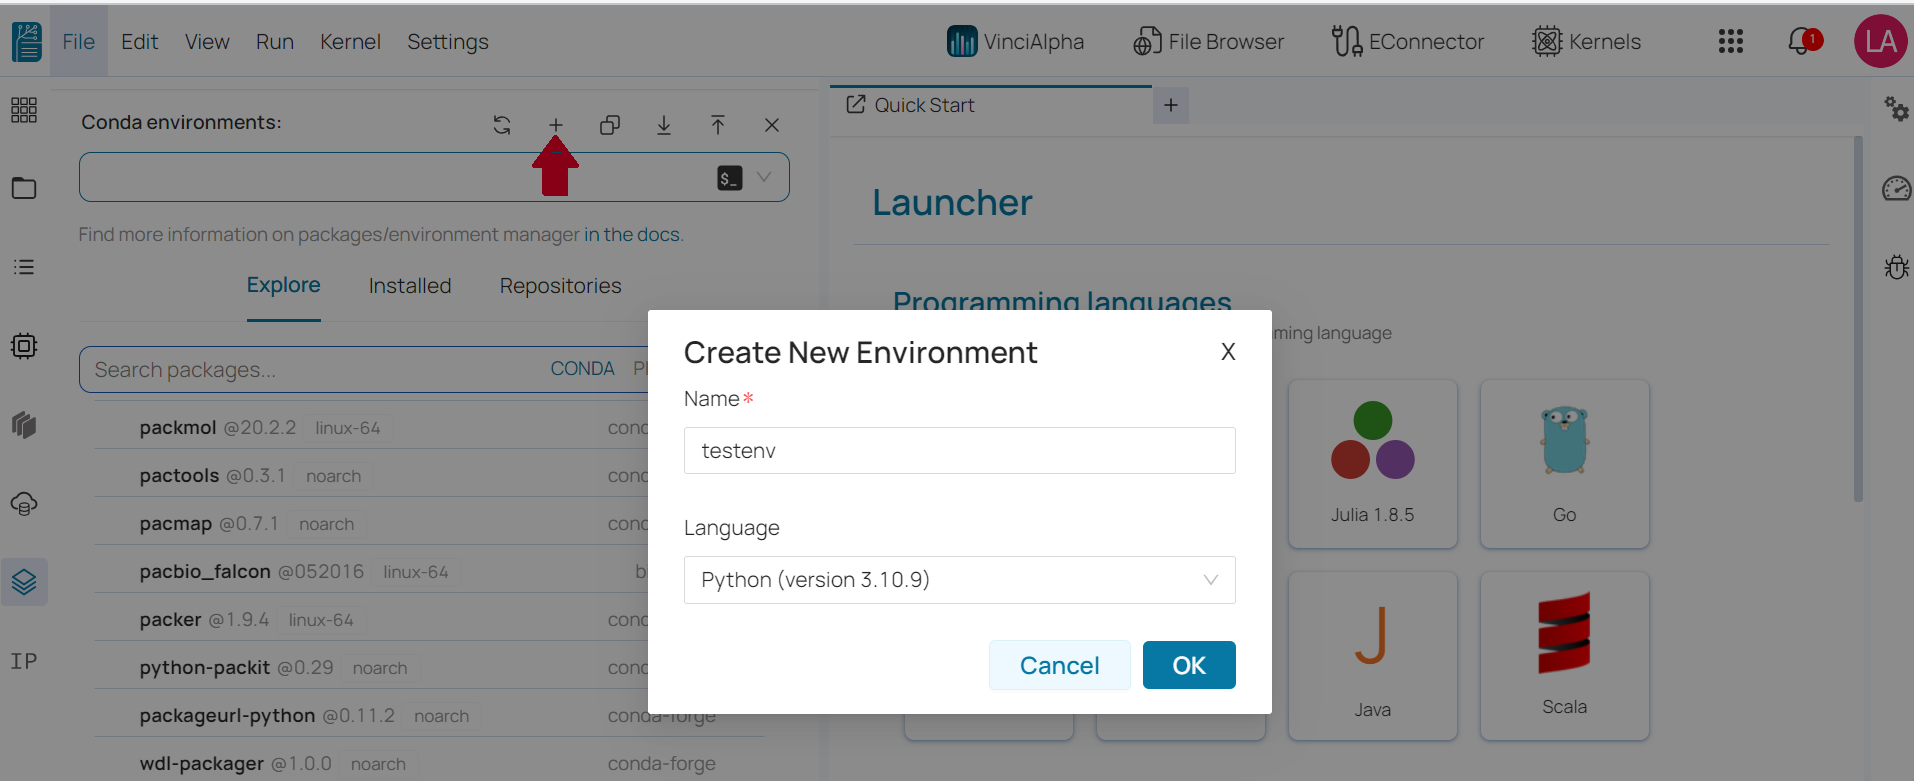
You can create a new Conda environment with pre-installed language by clicking on the Create New button.
1️⃣ Enter the environment name in the input field.
2️⃣ Select the required language with the version that you would like to have in the new environment.
3️⃣ Click on OK button to process next step.
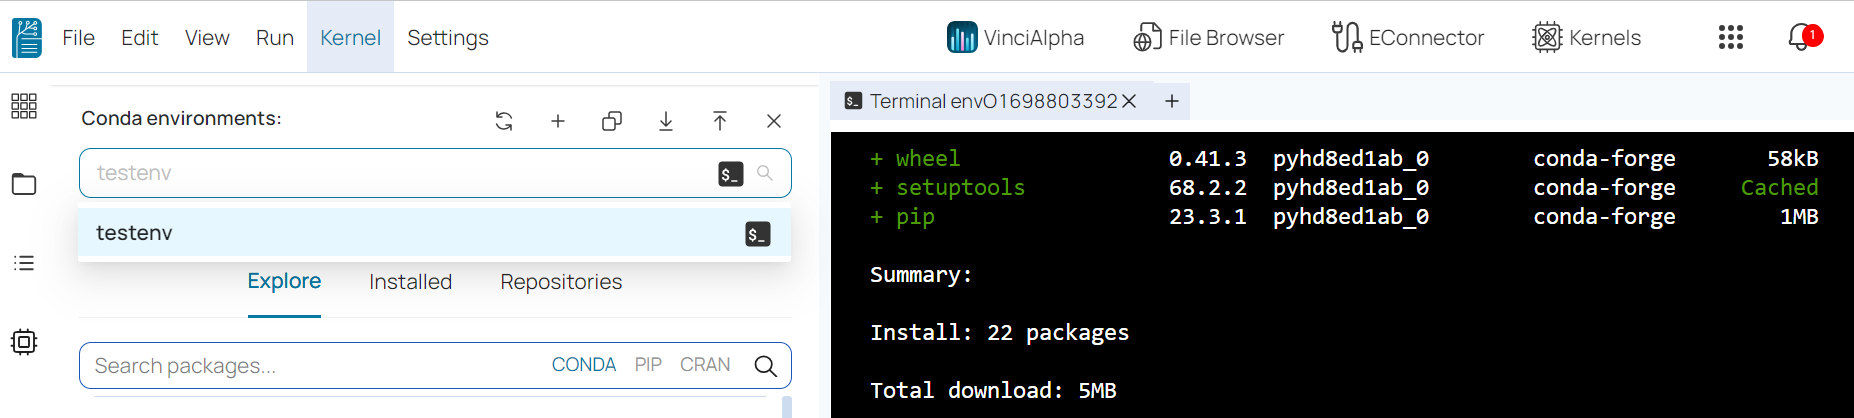
The terminal will automatically open on the right side with an activated environment. It’s up to the client to use this activated environment.
🔆 We can close this terminal by clicking Close button.

Refresh environment list 
🔆 Click on Refresh icon to update environment list.

In order to open a new terminal, activate a specific environment from the list.
🔆 Click on Terminal icon.
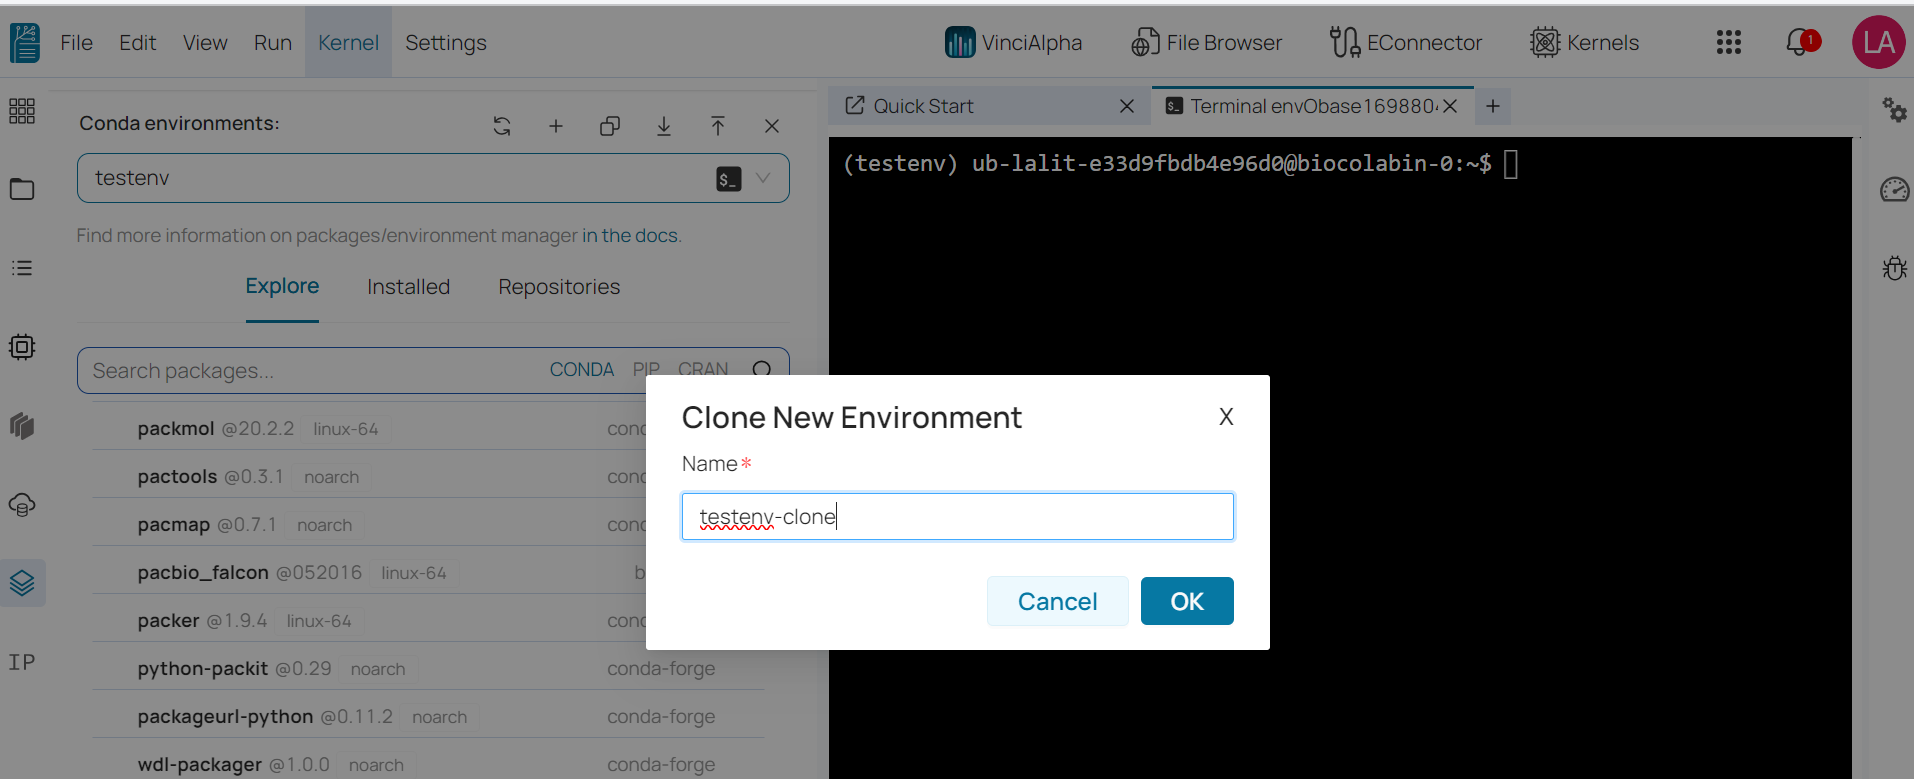
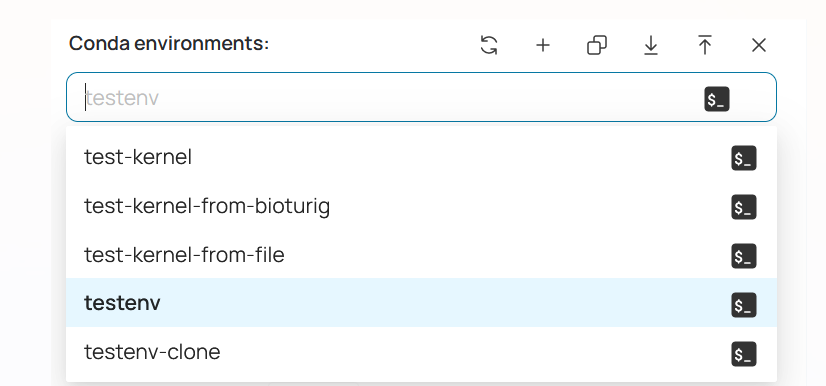
Clone environment 
We can create the similar environment from existing environment by clicking on Clone icon.
1️⃣ Enter the new environment name.
2️⃣ Click On OK button.
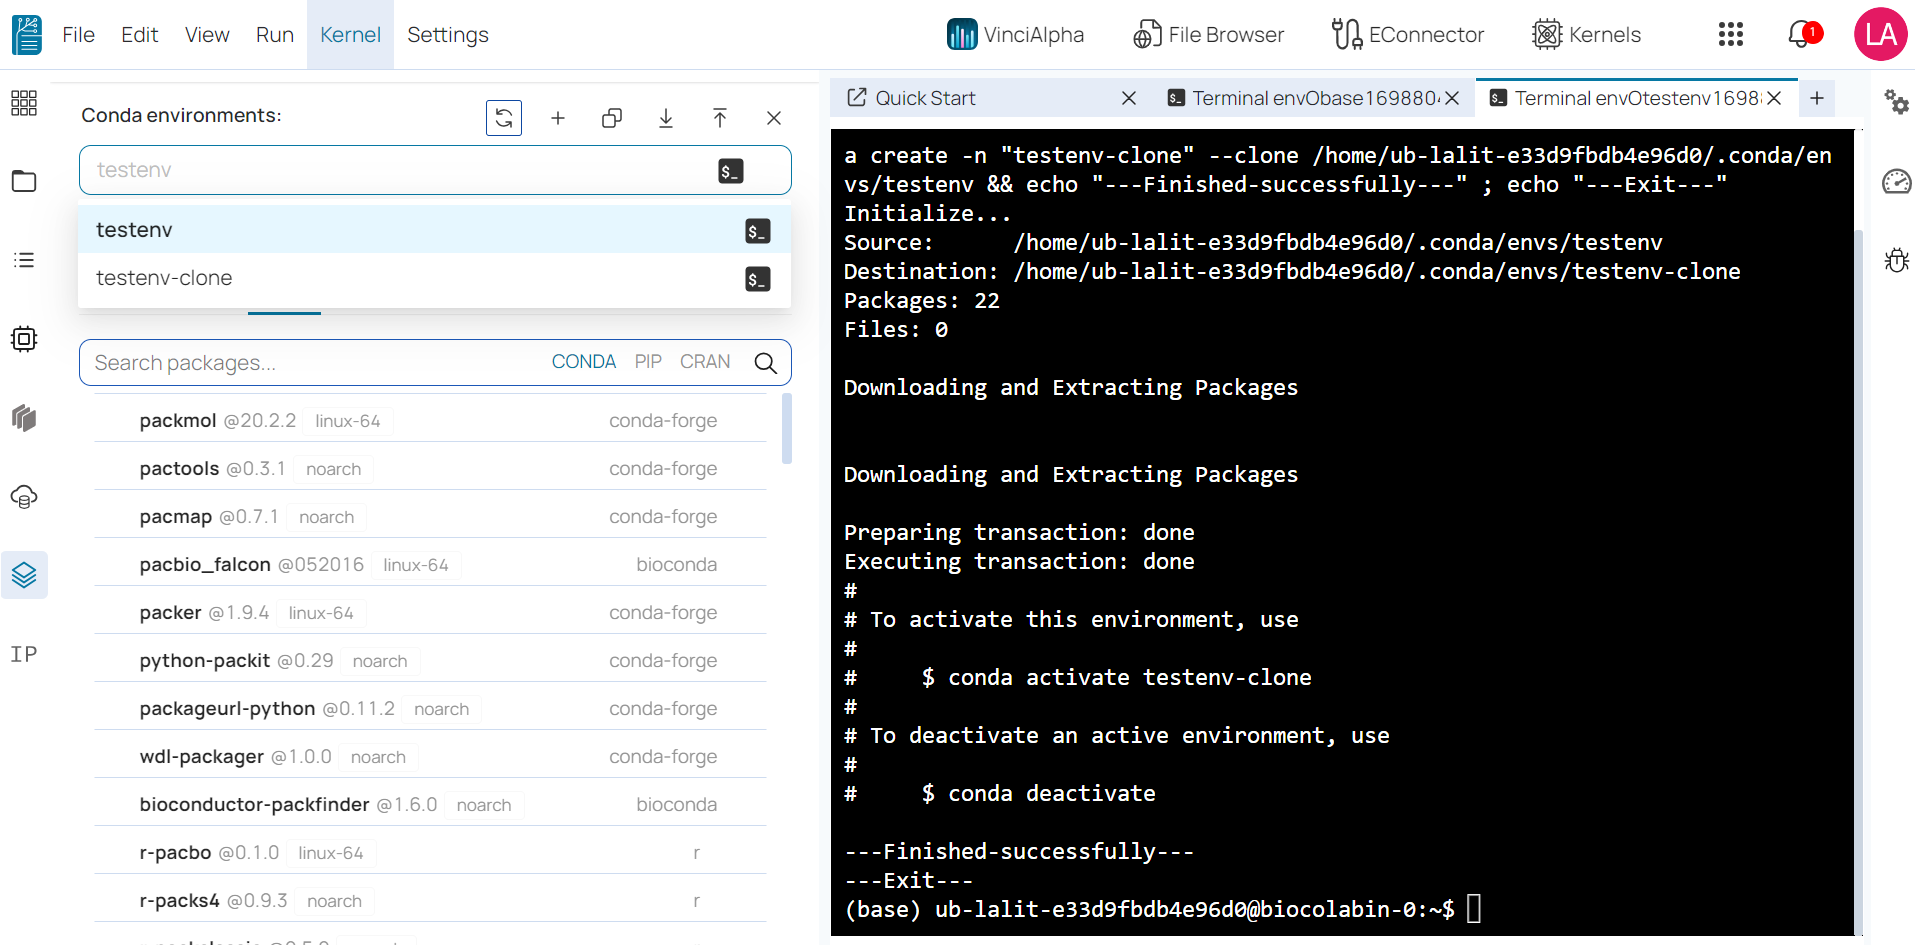
It will appear on the list as below.
Import environment from YAML file 
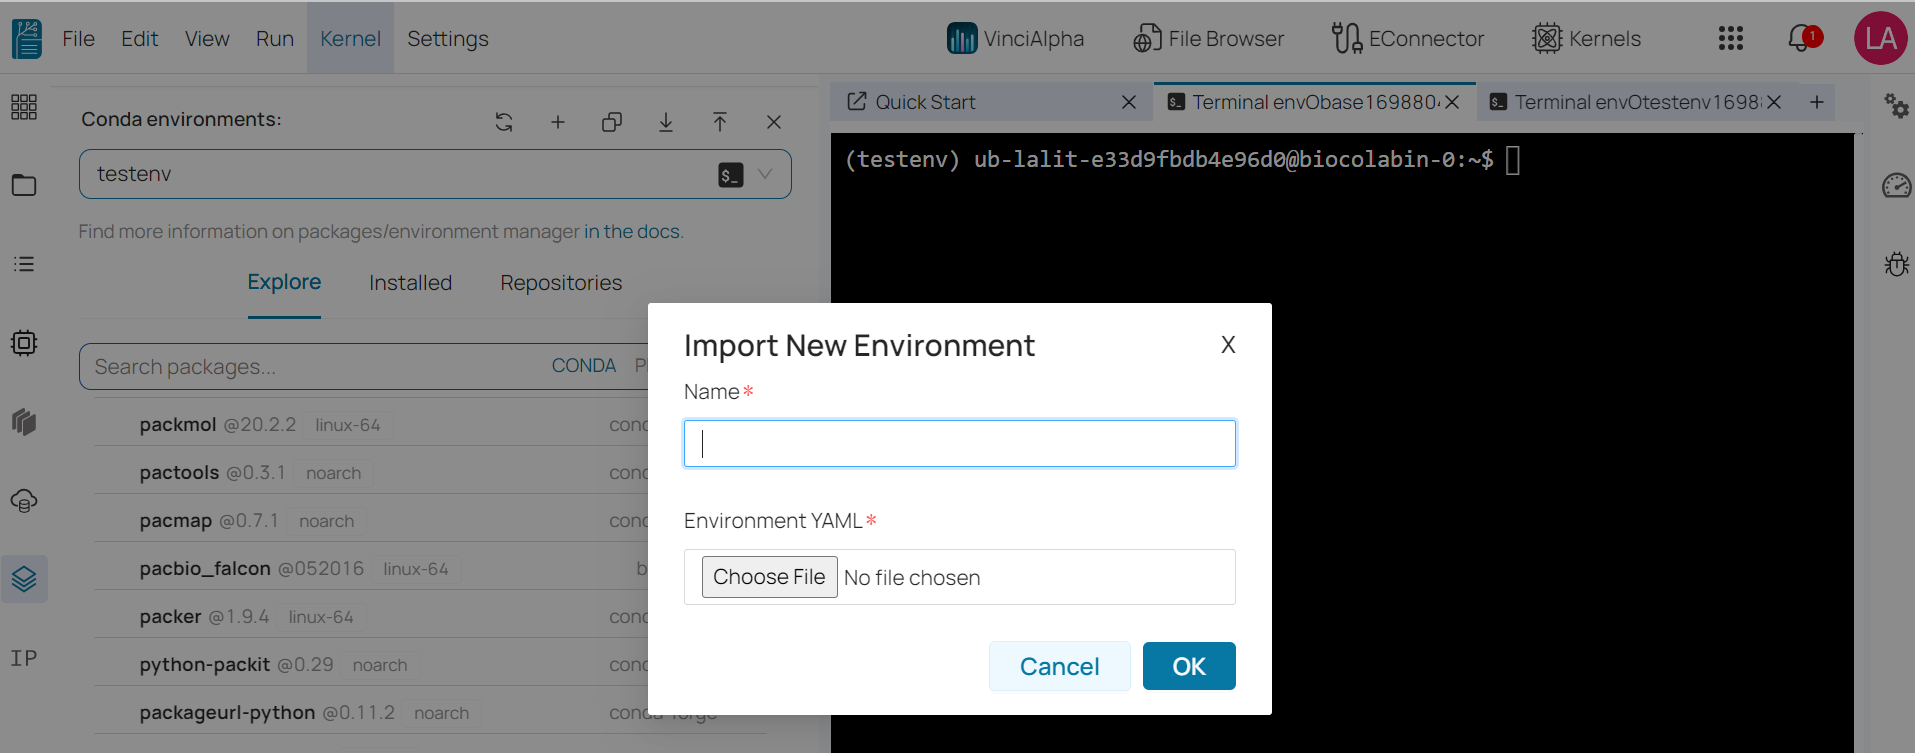
We can create an environment from a YAML file by clicking on the Import button.
1️⃣ Enter the new environment.
2️⃣ Upload YAML file from local machine.
3️⃣ Click on OK button.
Export environment to YAML file 
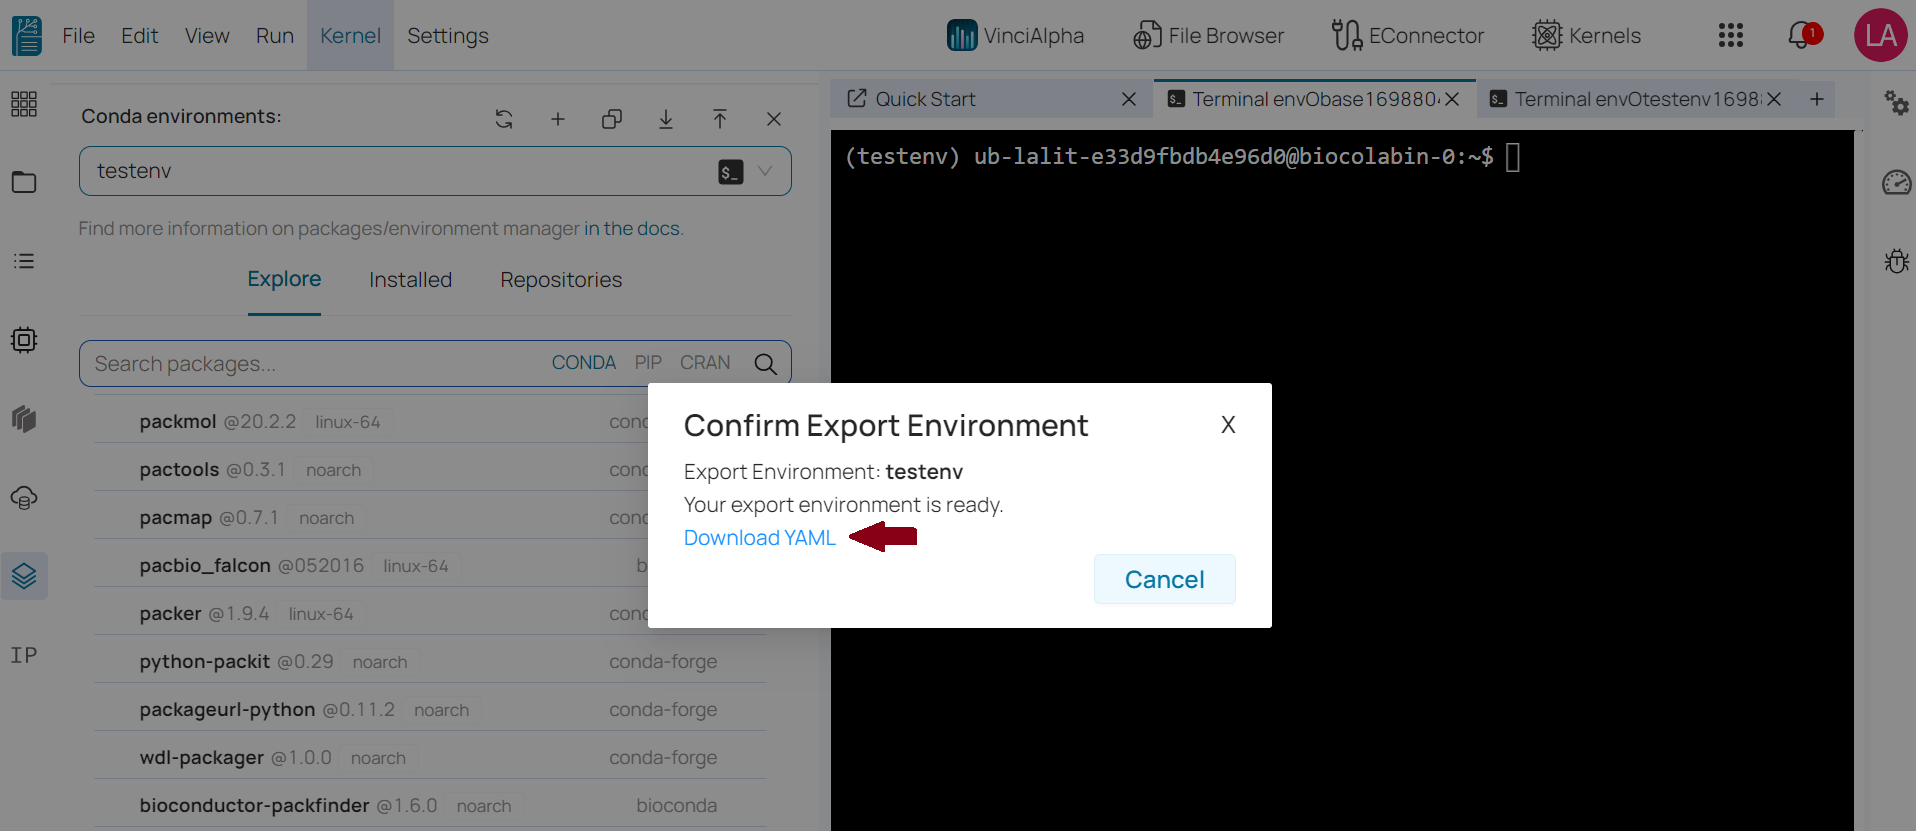
We can export the environment to a YAML file that can be downloaded to your local.
1️⃣ Select the environment that you would like to export from dropdown list.
2️⃣ Click on Export Button.
3️⃣ Once it is finished, it will automatically download YAML file to your local machine. In case not downloaded, click on Download YAML link.
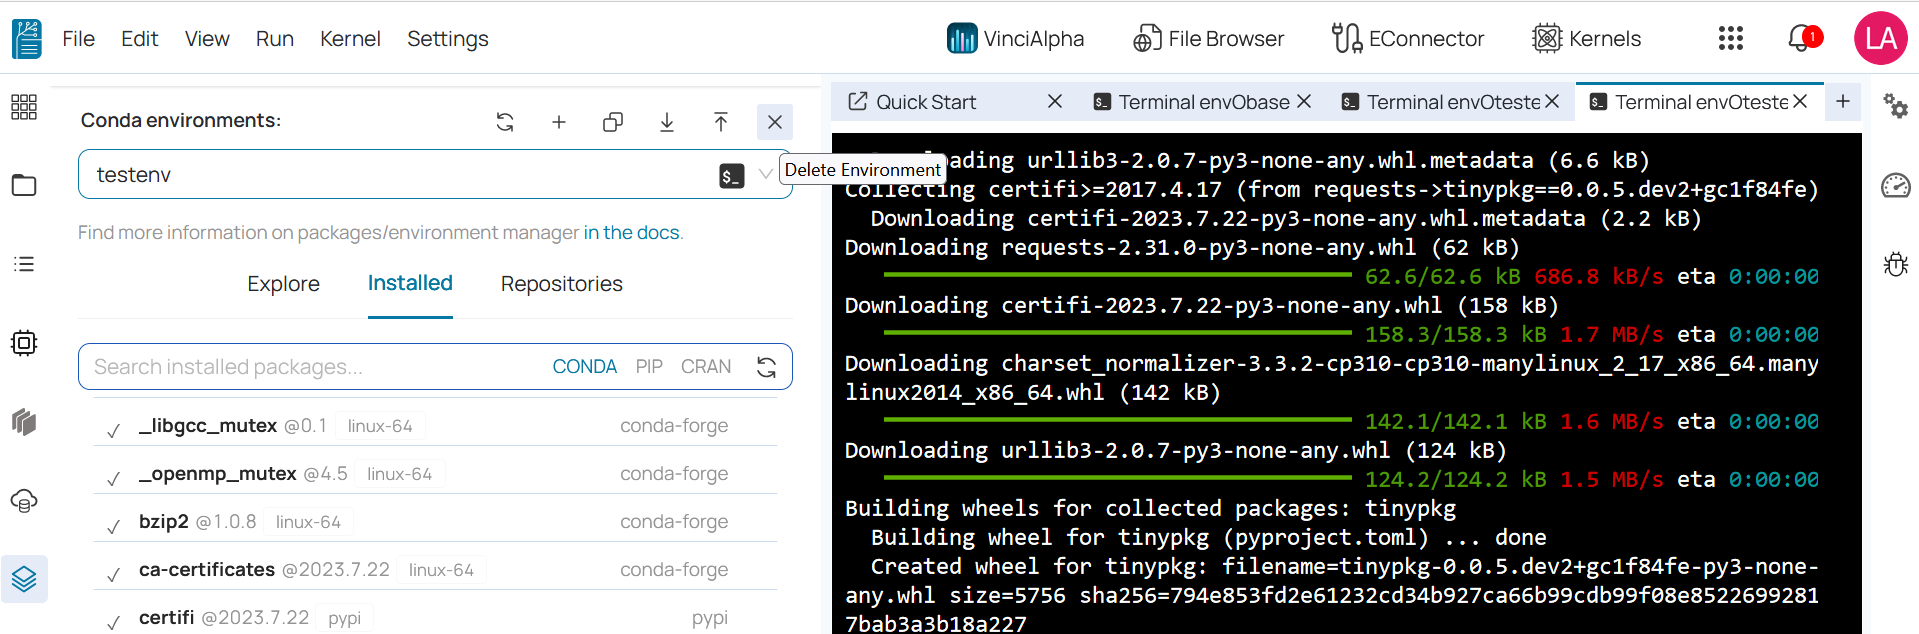
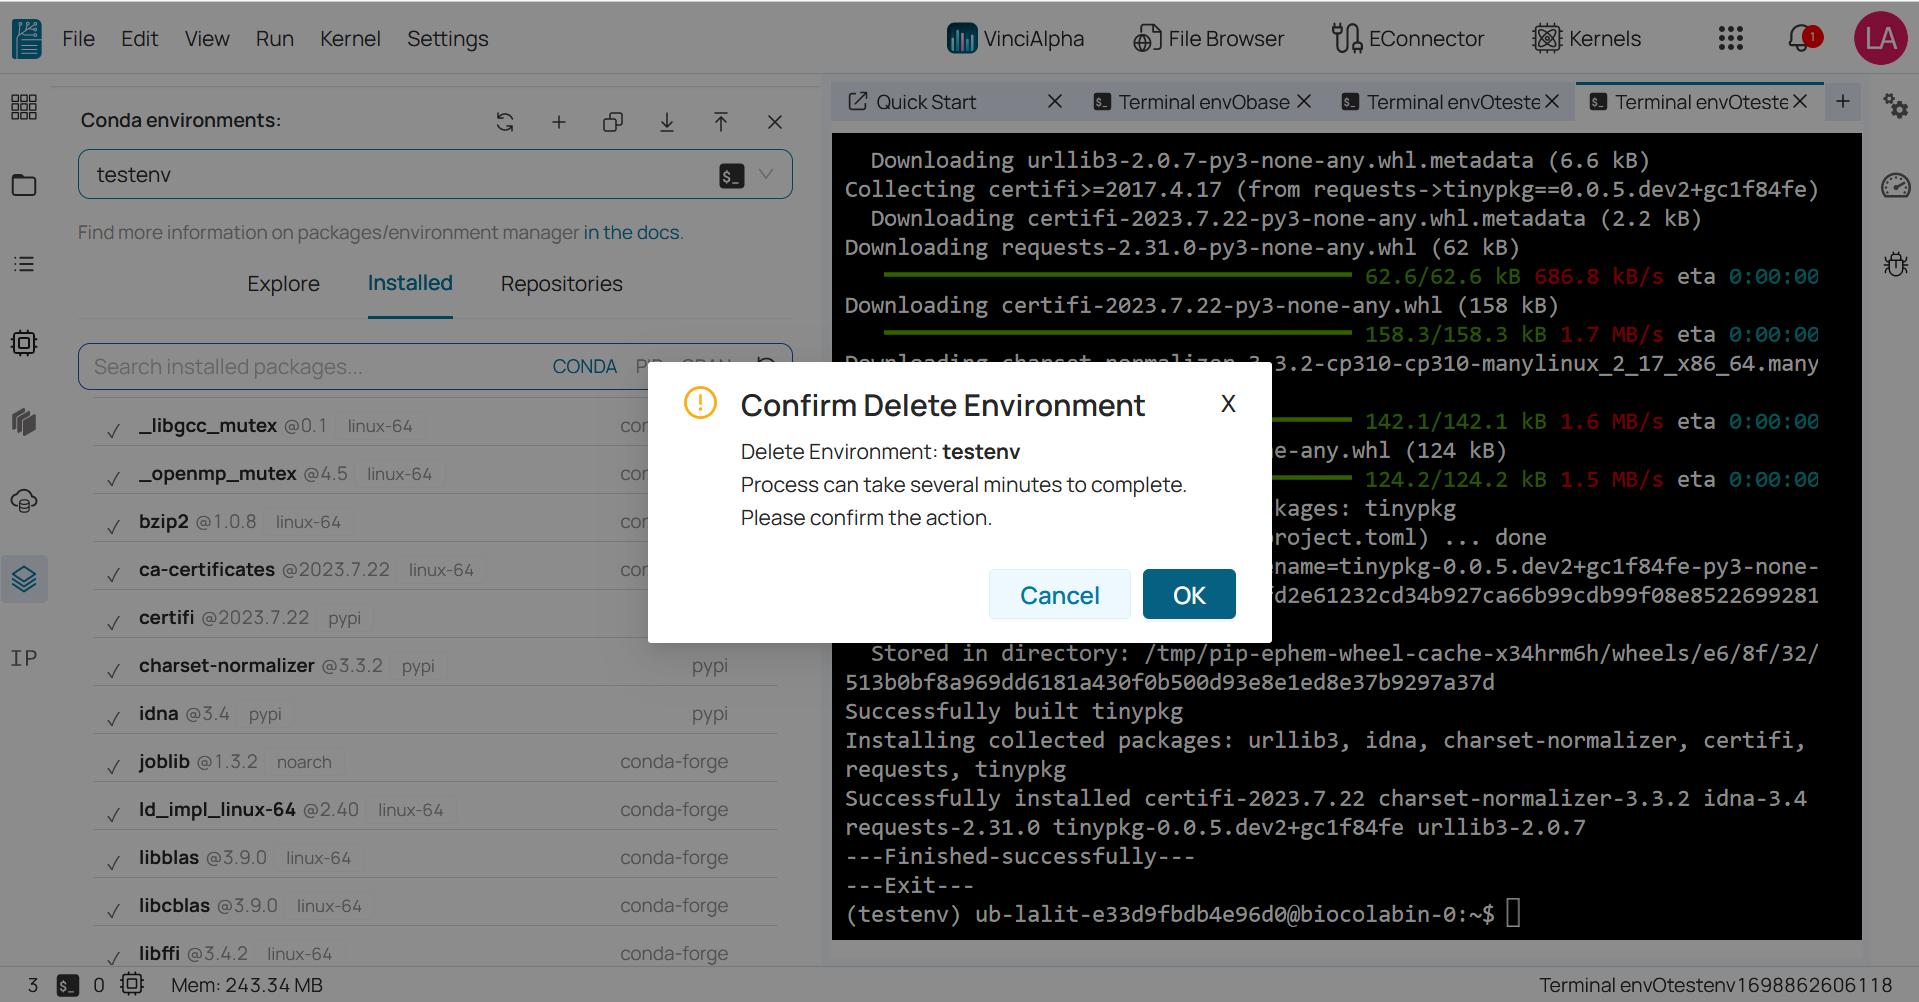
Delete environment 
🔆 Environment can be deleted by clicking Delete Environment button.
🔆 Click OK in the popup to confirm your action.
Install/Uninstall packages 
You can install packages to selected environment from available package on Explore / Repositories.
- You can choose environment to install/uninstall packages.
Find and install packages 
You can find and install packages to the selected environment.
1️⃣ Select the environment.
2️⃣ Click on Explore Tab.
3️⃣ Type the package name in the search field and press Enter. It will show all the packages for the same name from different channels.
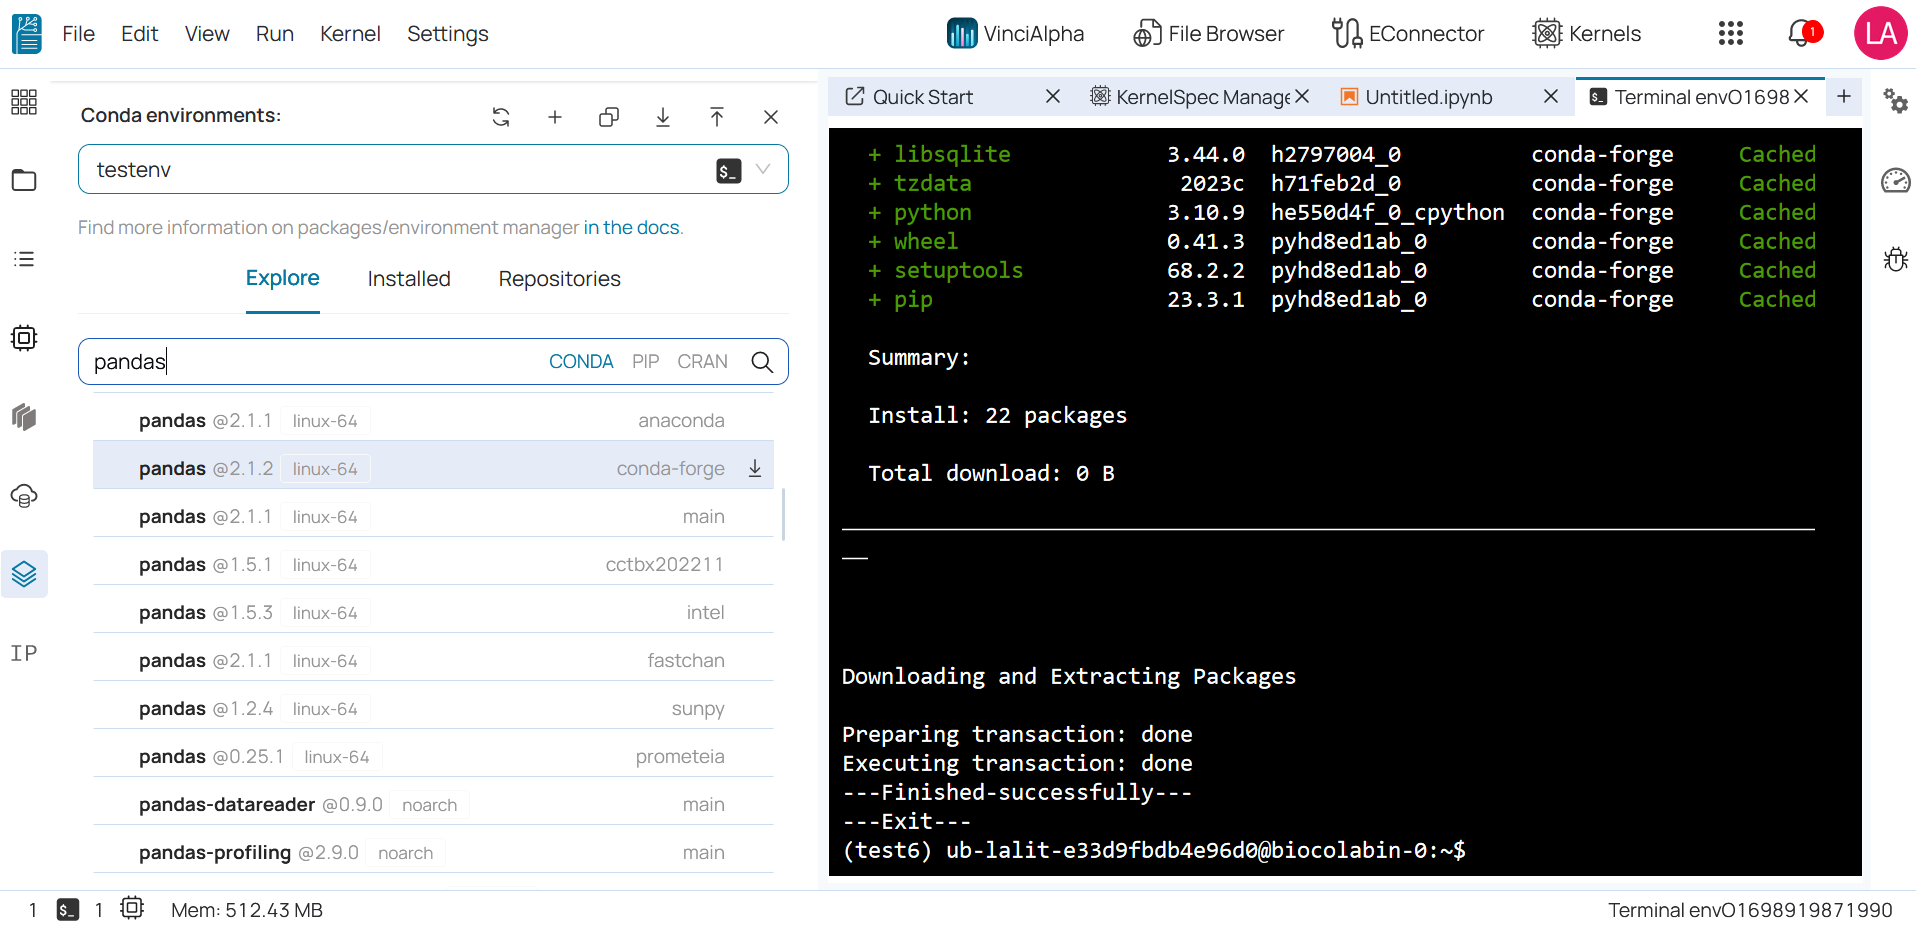
4️⃣ After you get the search results, click the intended package to open it in a new tab. This allows you to view the package details and choose the version to install.
5️⃣ click on Install. Click OK in the popup to confirm your action.
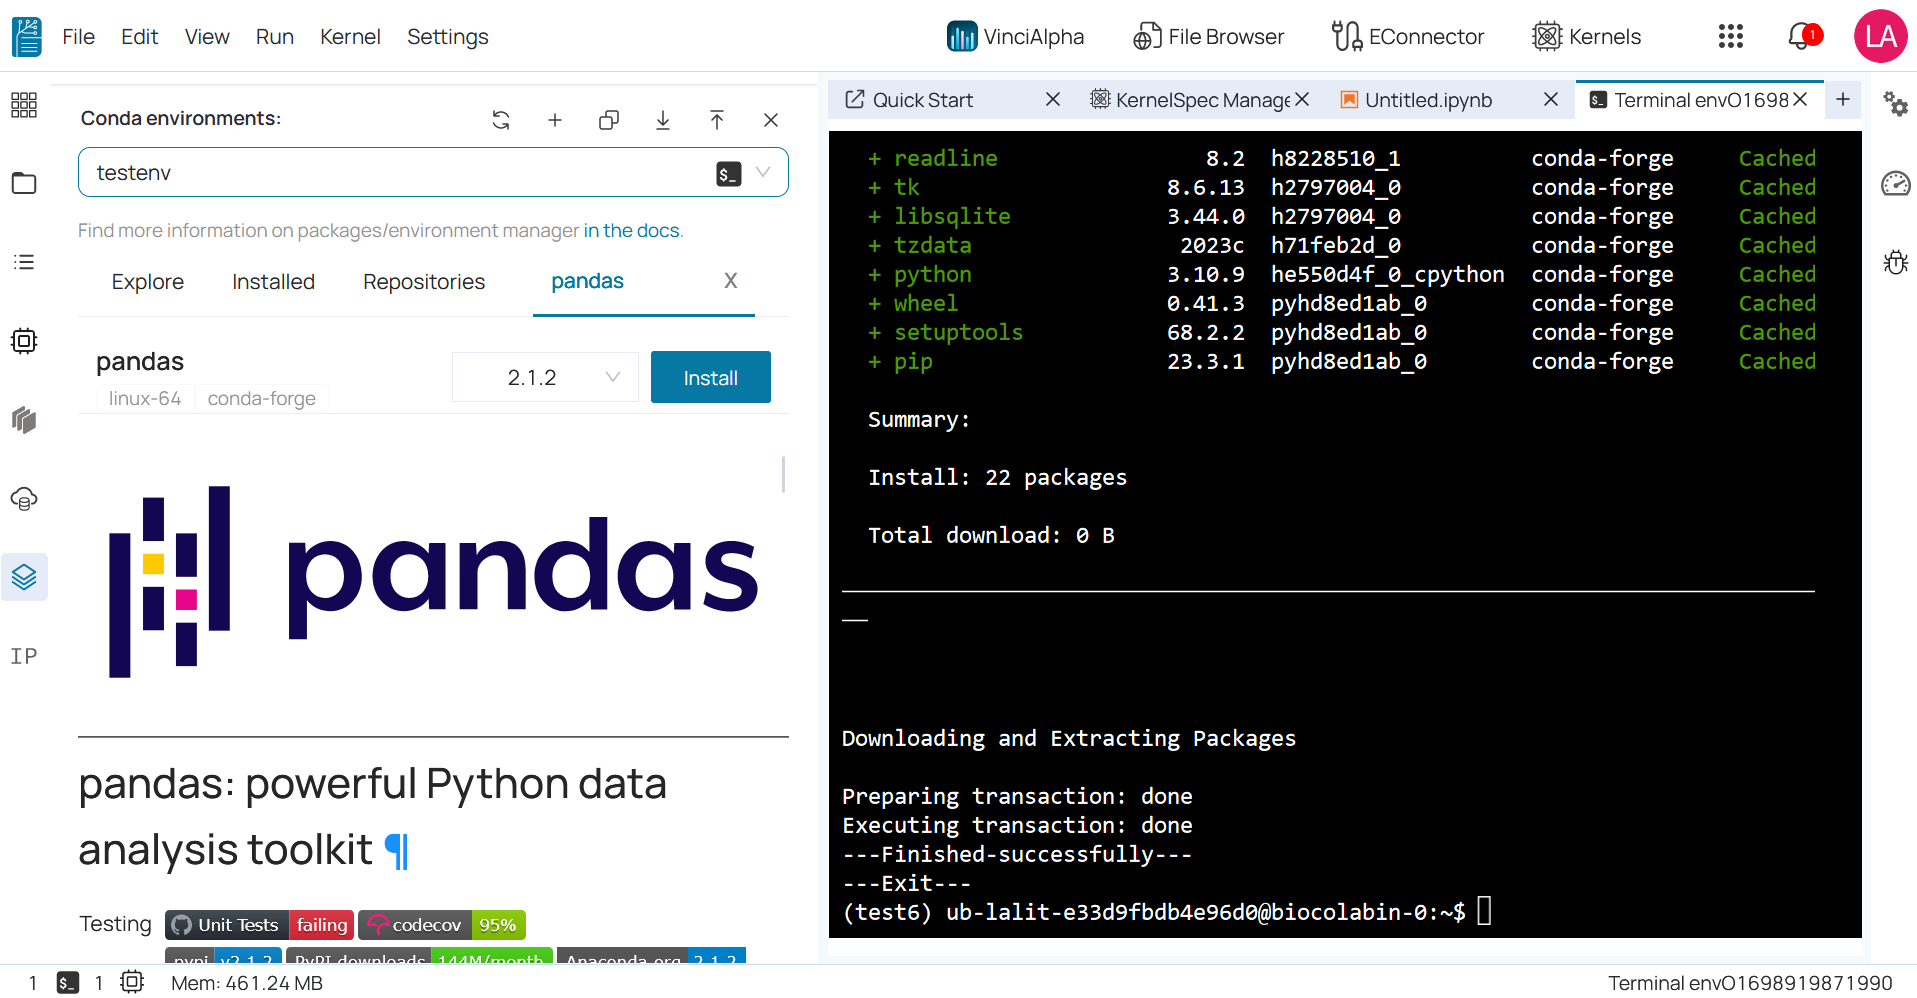
Installed packages would be listed on Installed tab. You can uninstall or update it later.
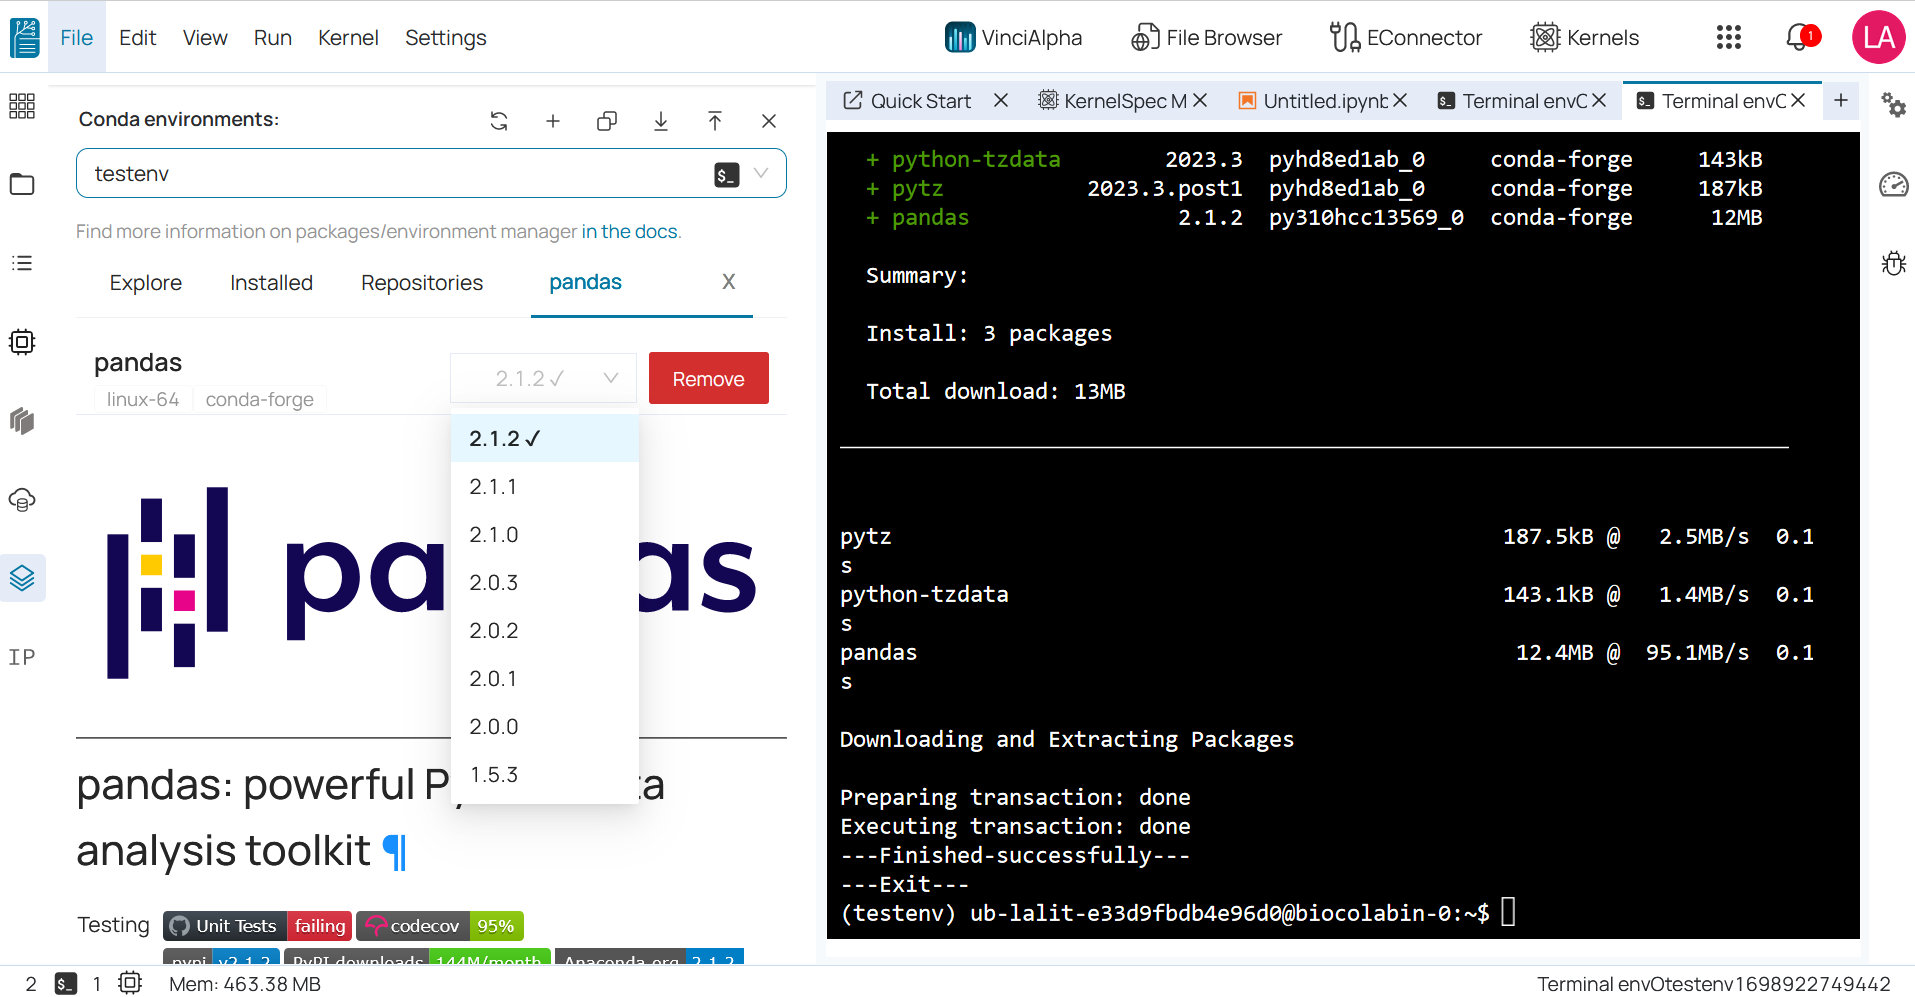
Update packages 
You can update existing conda packages in the environment.
1️⃣ Select the environment.
2️⃣ Switch to Installed tab. Search packages you want to update, then click on it to go to detail tab, select specific version that you would like to update.
3️⃣ Click OK in the popup to confirm your action.
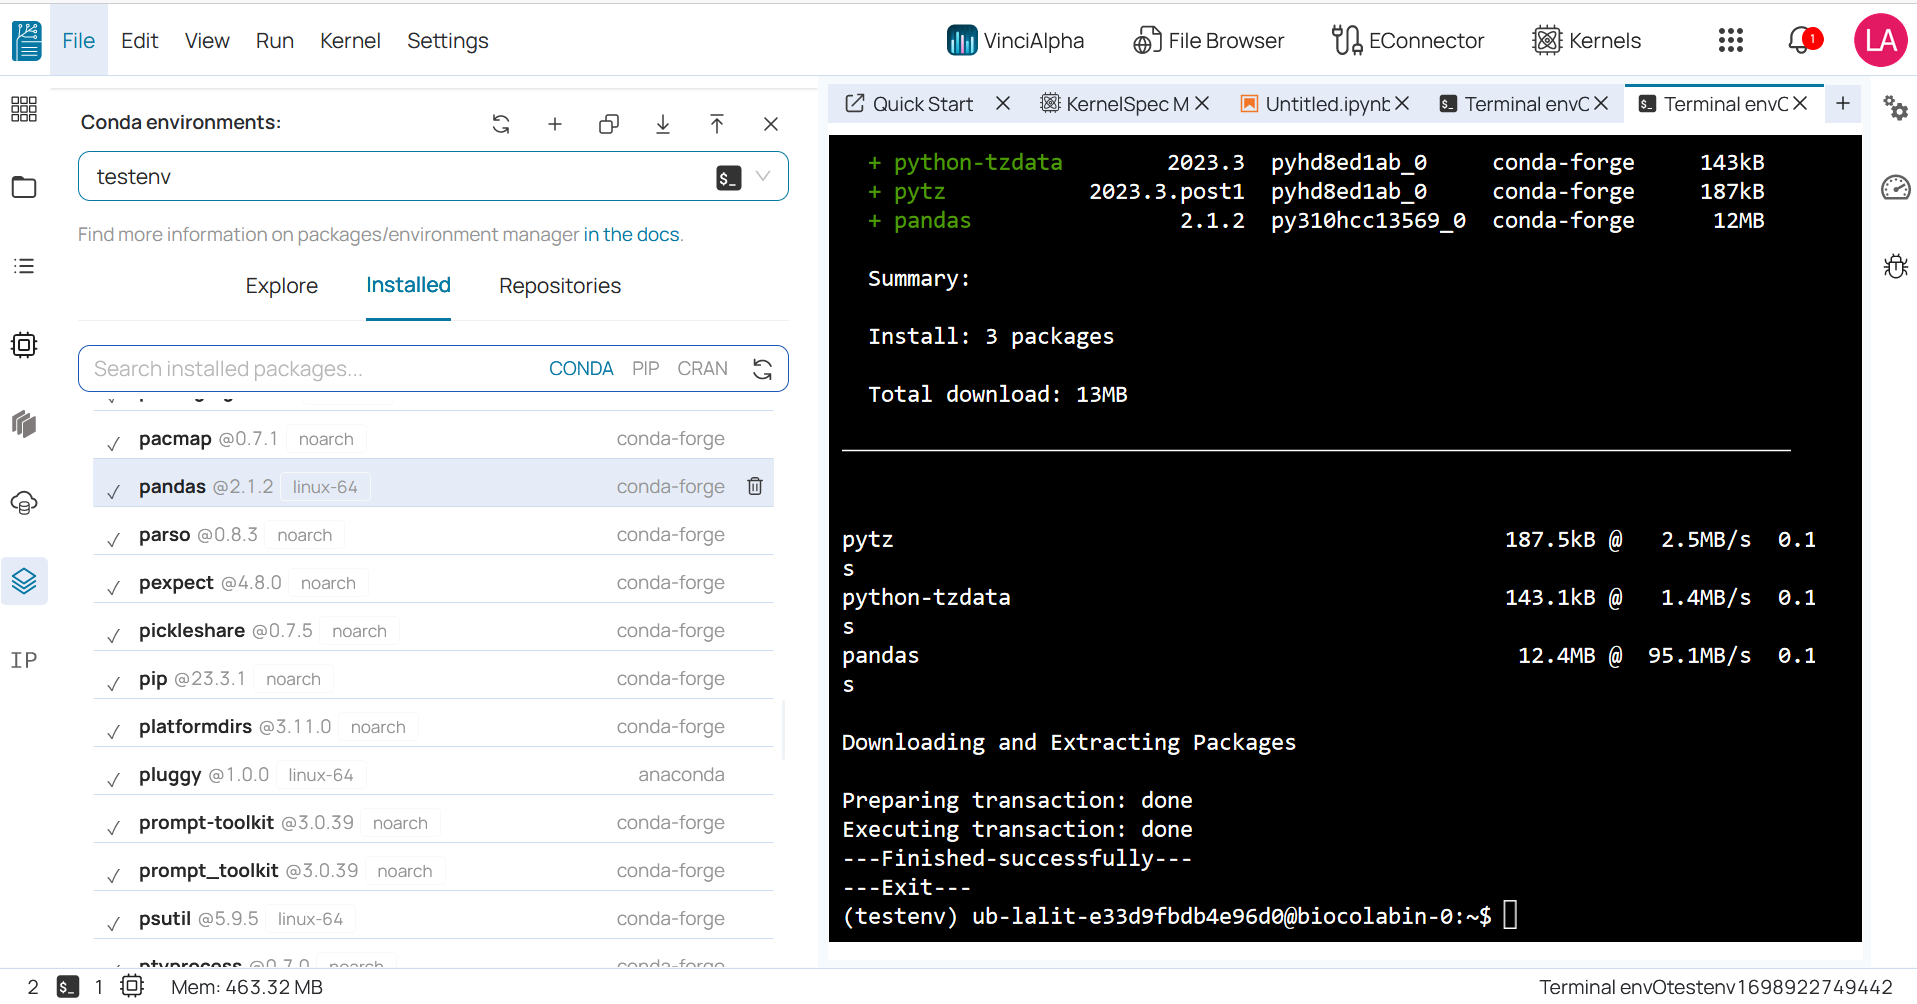
Uninstall packages 
You can uninstall conda packages in the environment.
1️⃣ Select the environment.
2️⃣ Switch to Installed tab. Search packages you want to uninstall, then click on Uninstall icon.
3️⃣ Click OK in the popup to confirm your action.
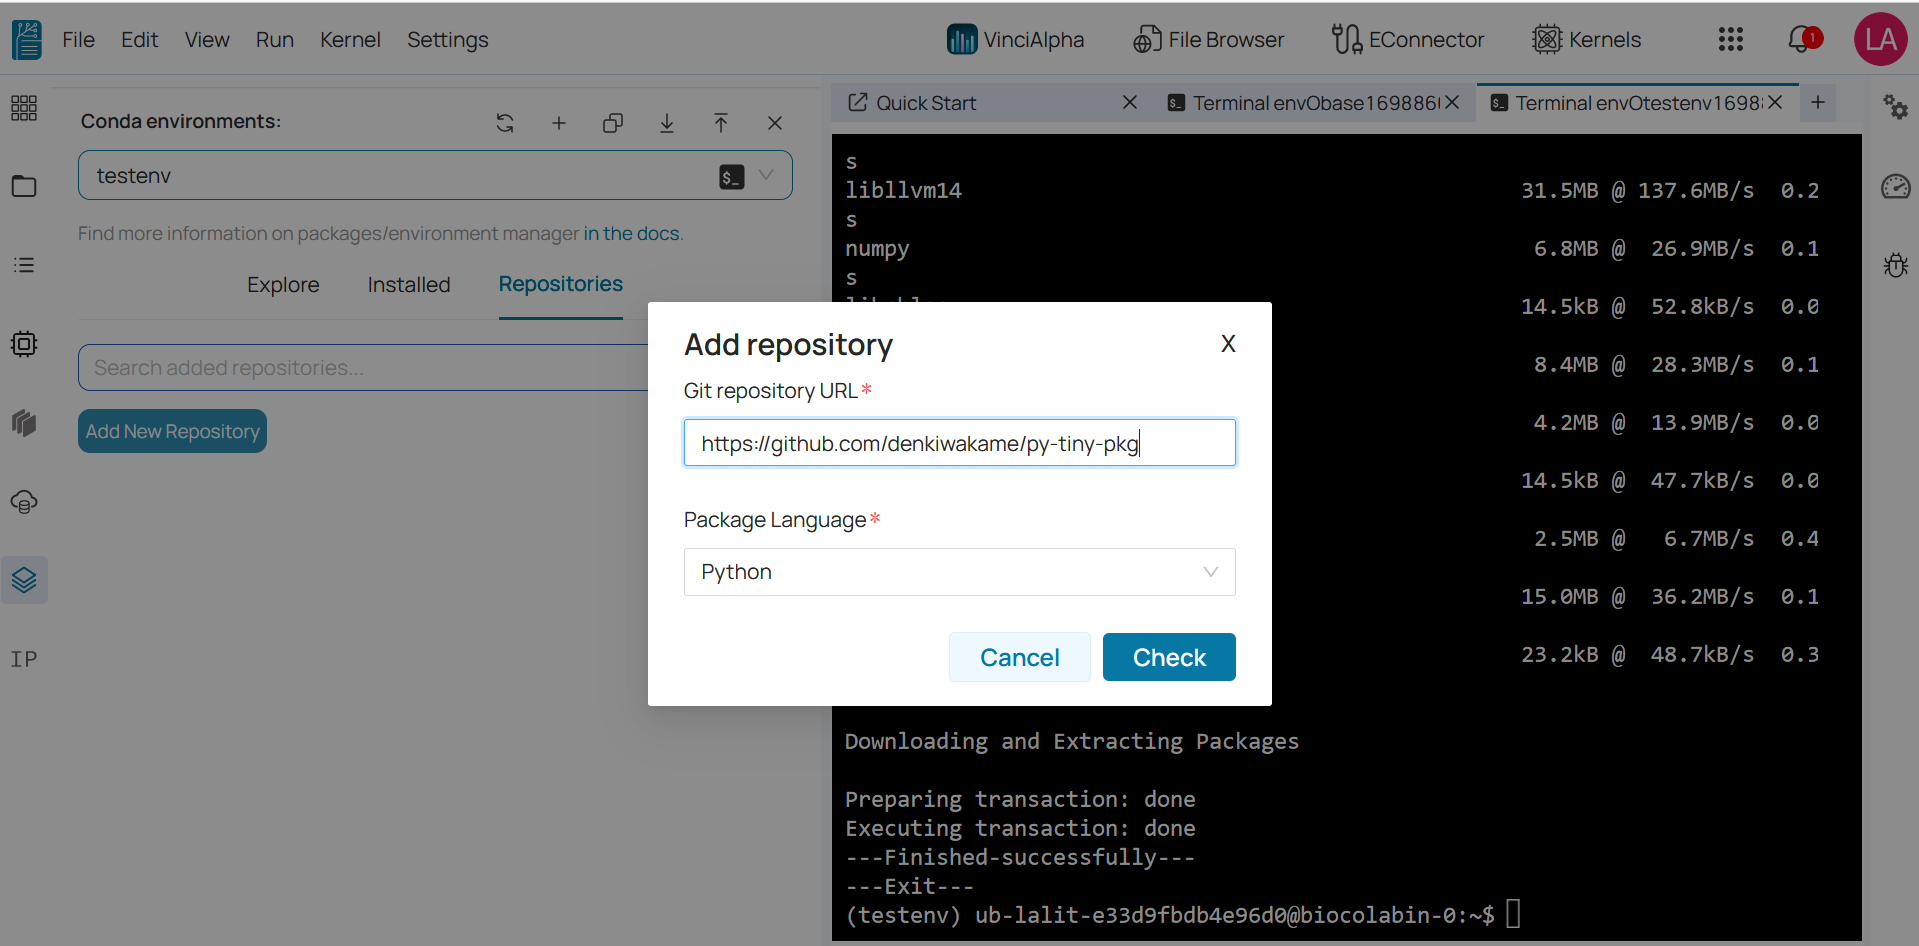
Install packages from Git repository 
For packages from github repository, you can install it by following steps:
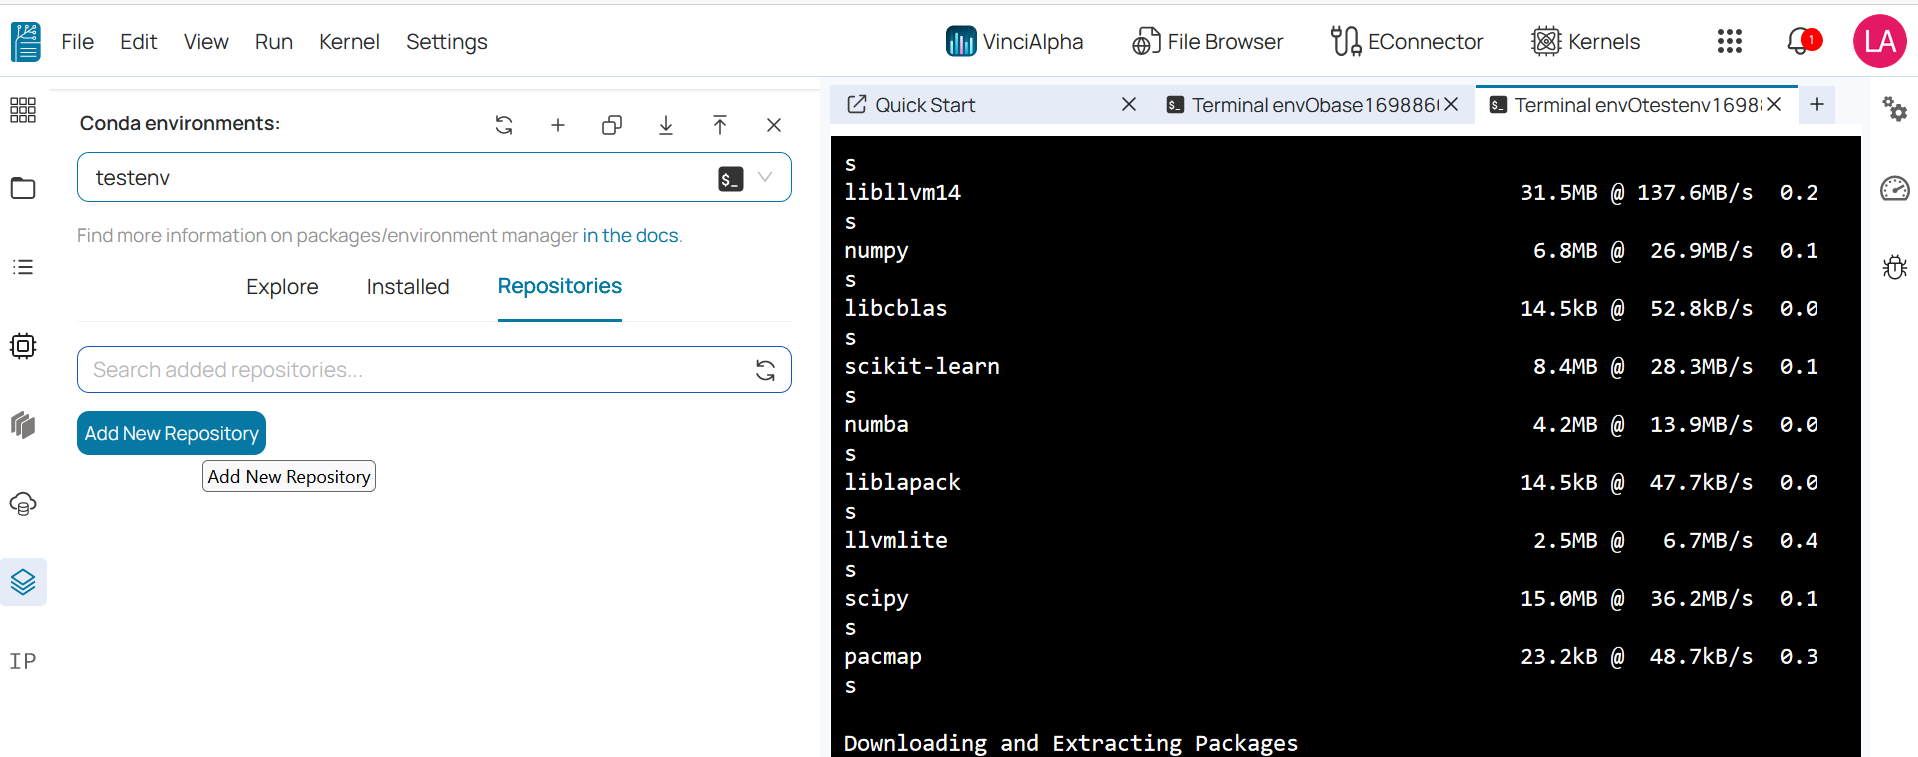
1️⃣ Select the environment.
2️⃣ Go to Repositories tab, Click to button Add New Repository.
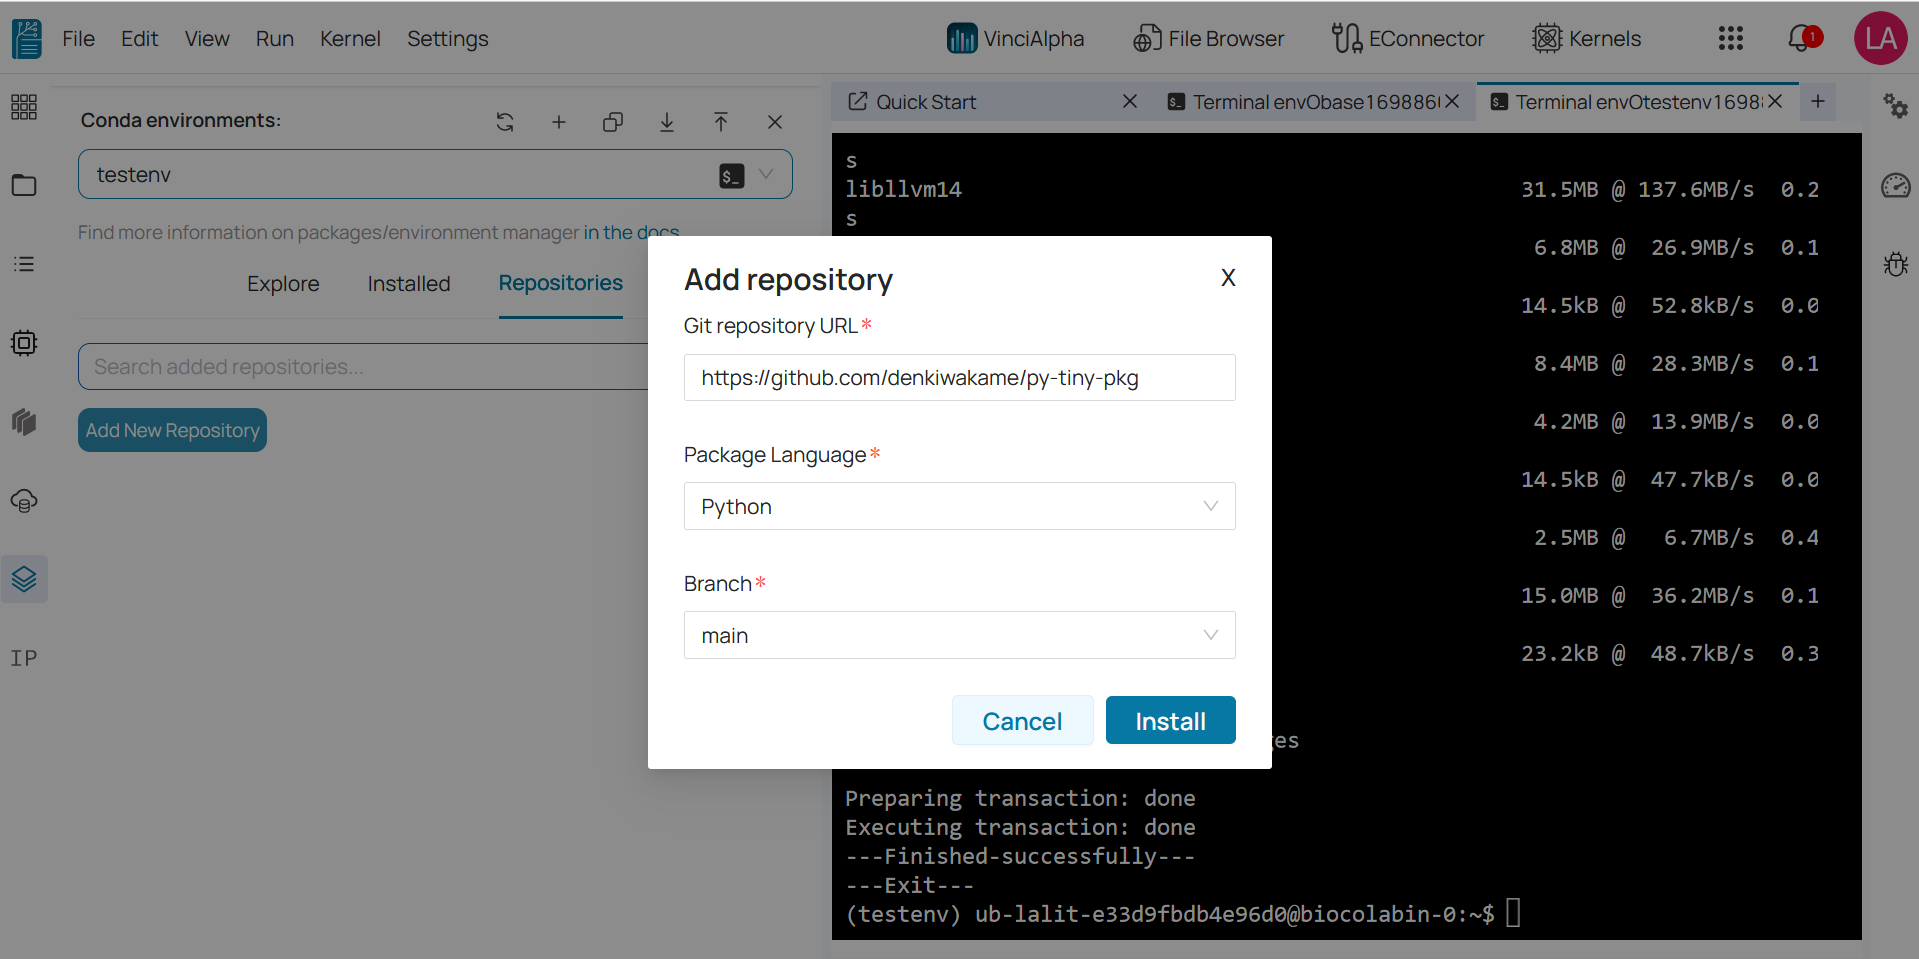
3️⃣ Enter Git repository URL, select package language and click on Check button.
🔆 It will prompt for branch. By default it will be main branch. You can switch to another branch that you would like install.
🔆 Click on Install. Click OK in the popup to confirm your action.
Notebook Kernel Manager 
Kernels: are specific instances of a programming environment that BioStudio uses to execute code in a notebook. Each kernel corresponds to a particular environment. This means that you can have multiple kernels running concurrently, each associated with a different environment.
You can create with empty notebook or connect existing noteboook with pre-build kernels:
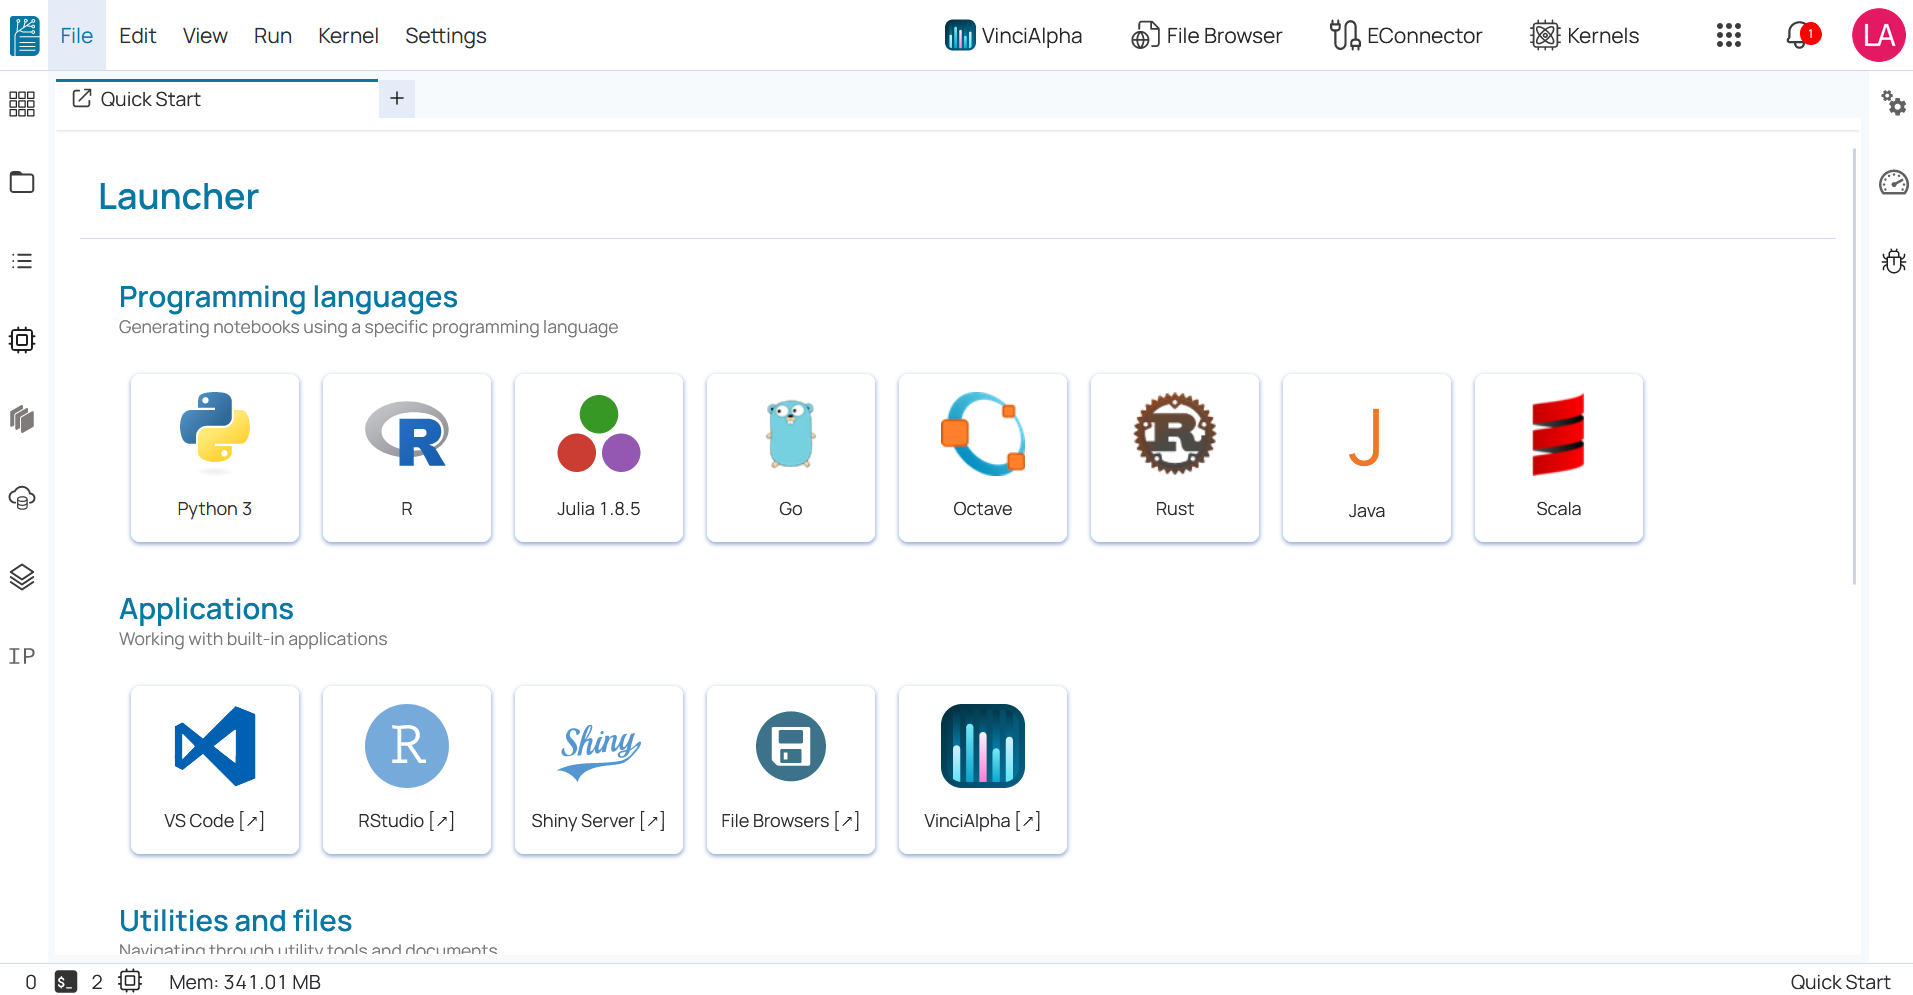
You can also create custom kernel based on your requirements.
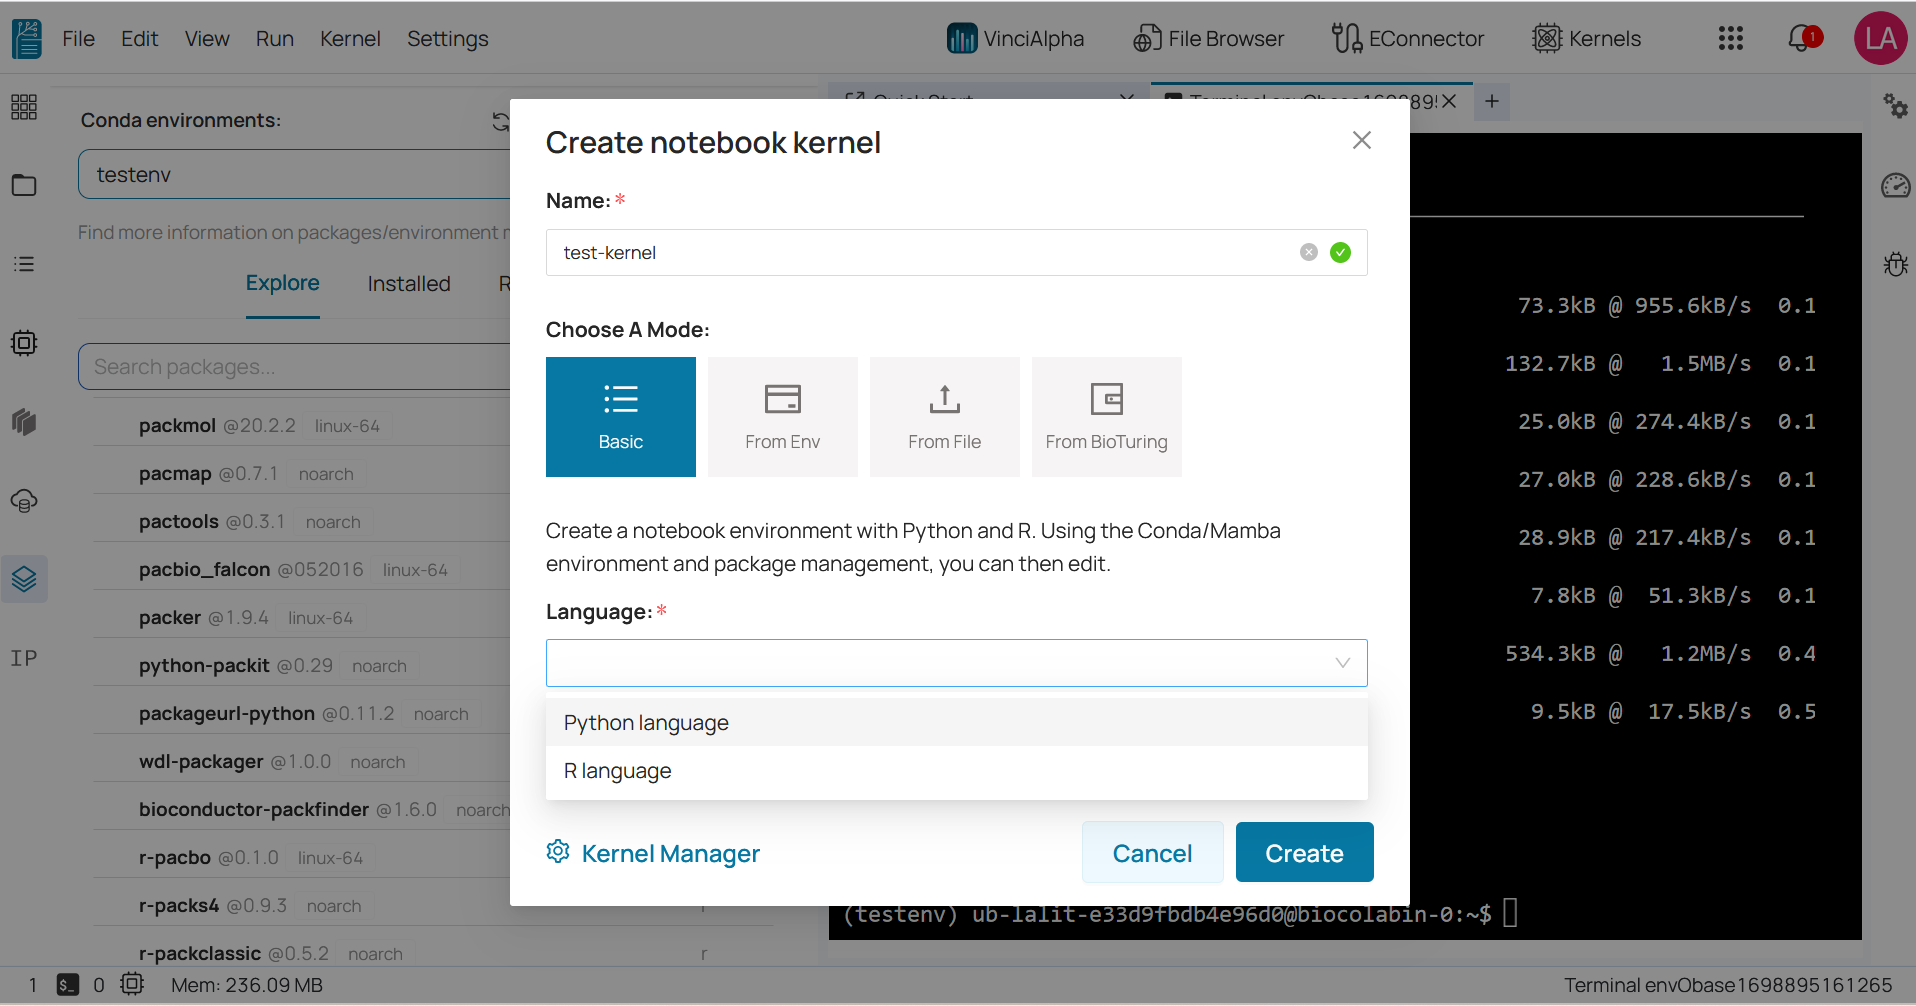
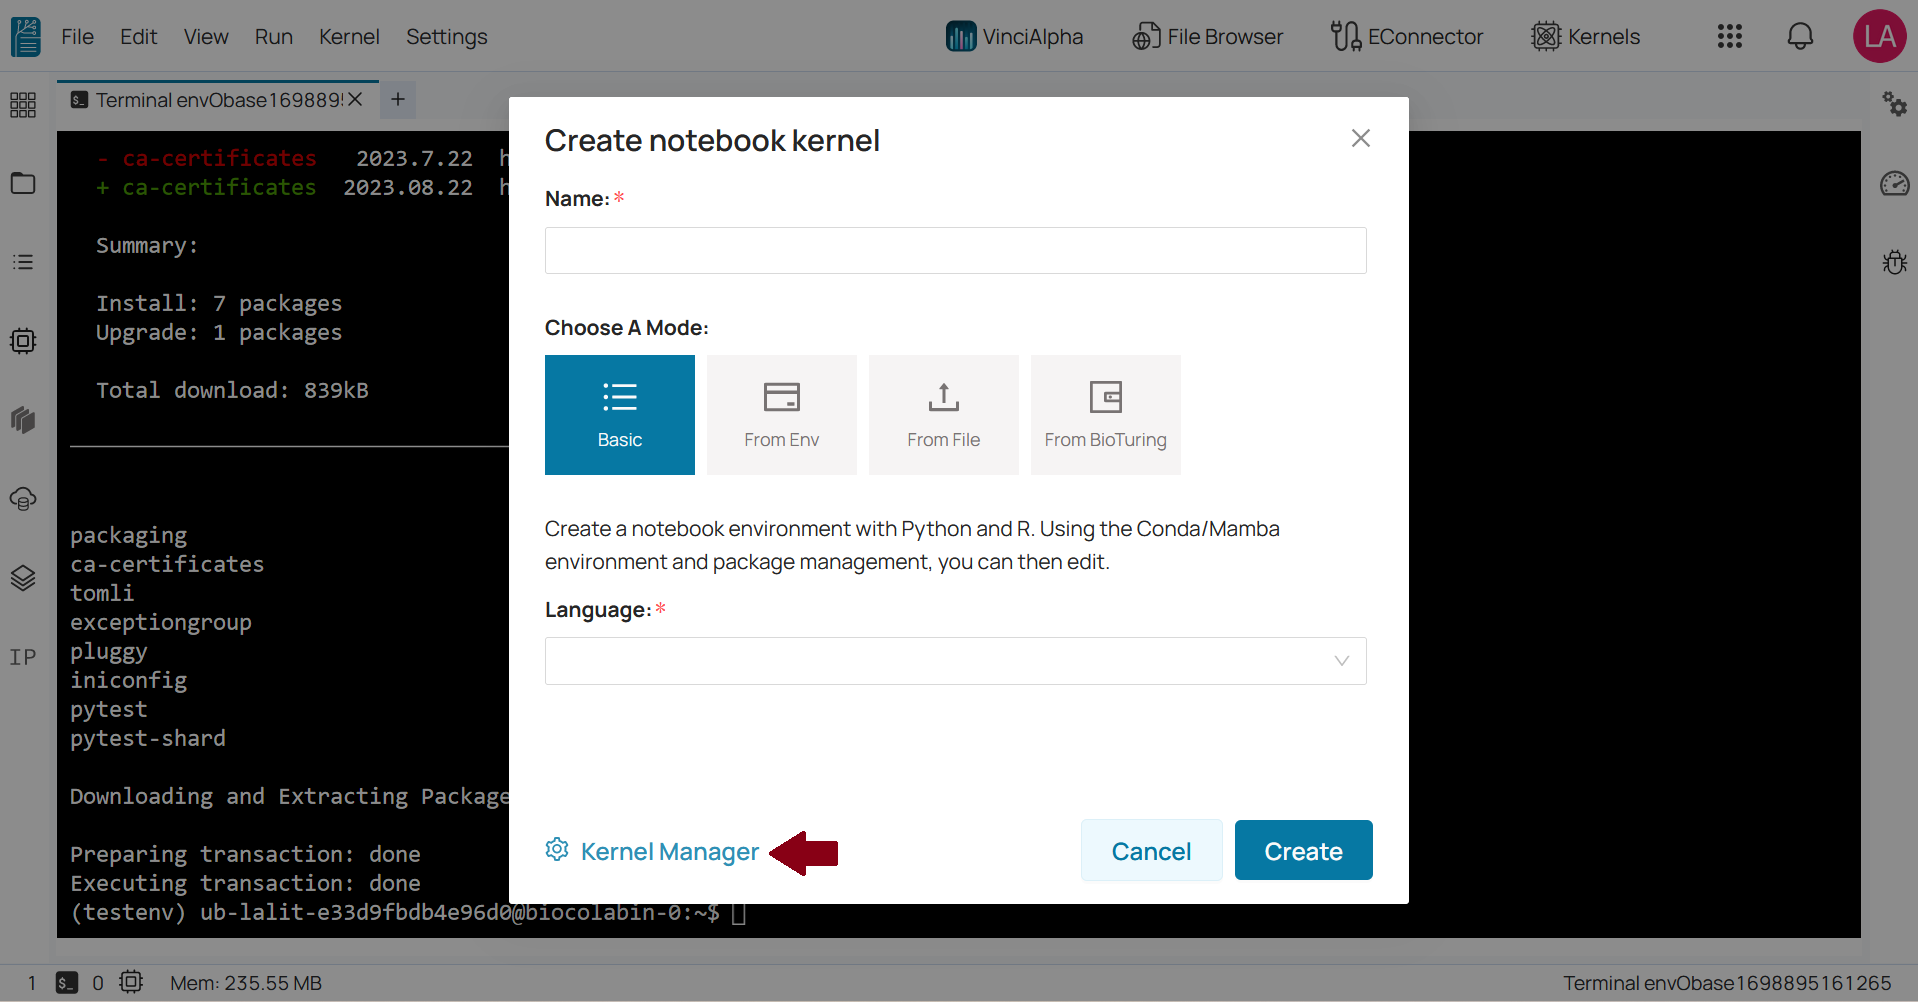
Create notebook kernel 
🔆 You can create kernel by clicking Kernel Icon.
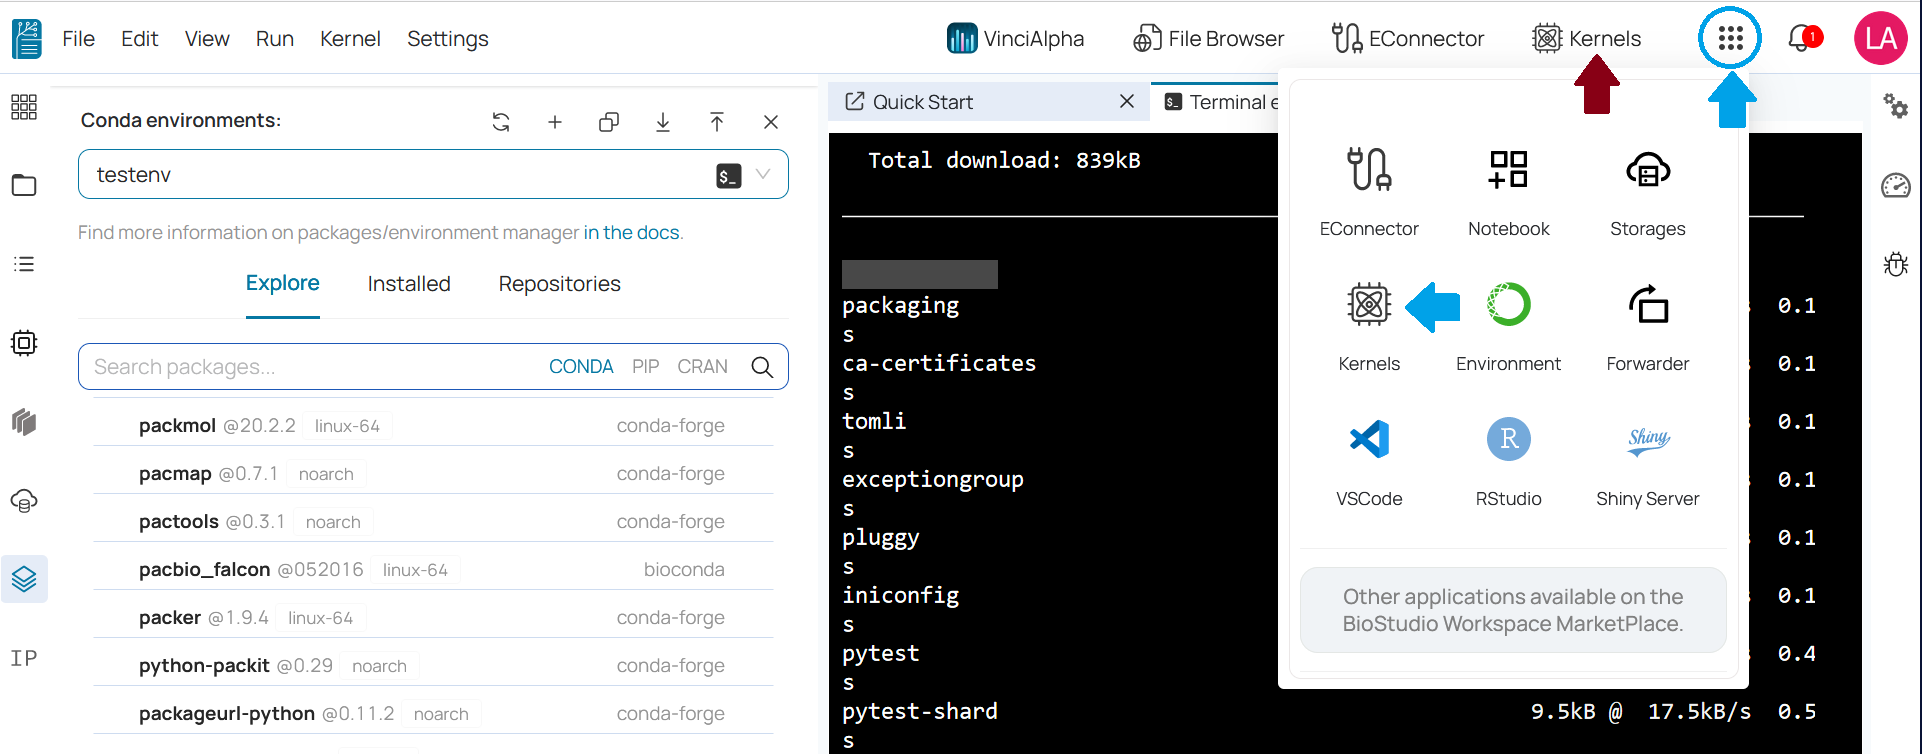
Then, the popup will appear, which have four options:
1. Basic
2. From Env (From existing environment)
3. From File
4. From BioTuring
Basic Mode 
1️⃣ Enter the kernel name.
2️⃣ Choose A Mode: Basic. In this mode, it will create a general environment and kernel. All basic package will be attached with this Kernel.
3️⃣ Select specific language in language field. Currently, BioStudio is supporting two languages: Python and R.
4️⃣ Select version based on selected language. If pre-define versions are not suitable for your requirements, you can type the version that you would like to install, and then, click Add Customize button to apply.
5️⃣ Click Create button.
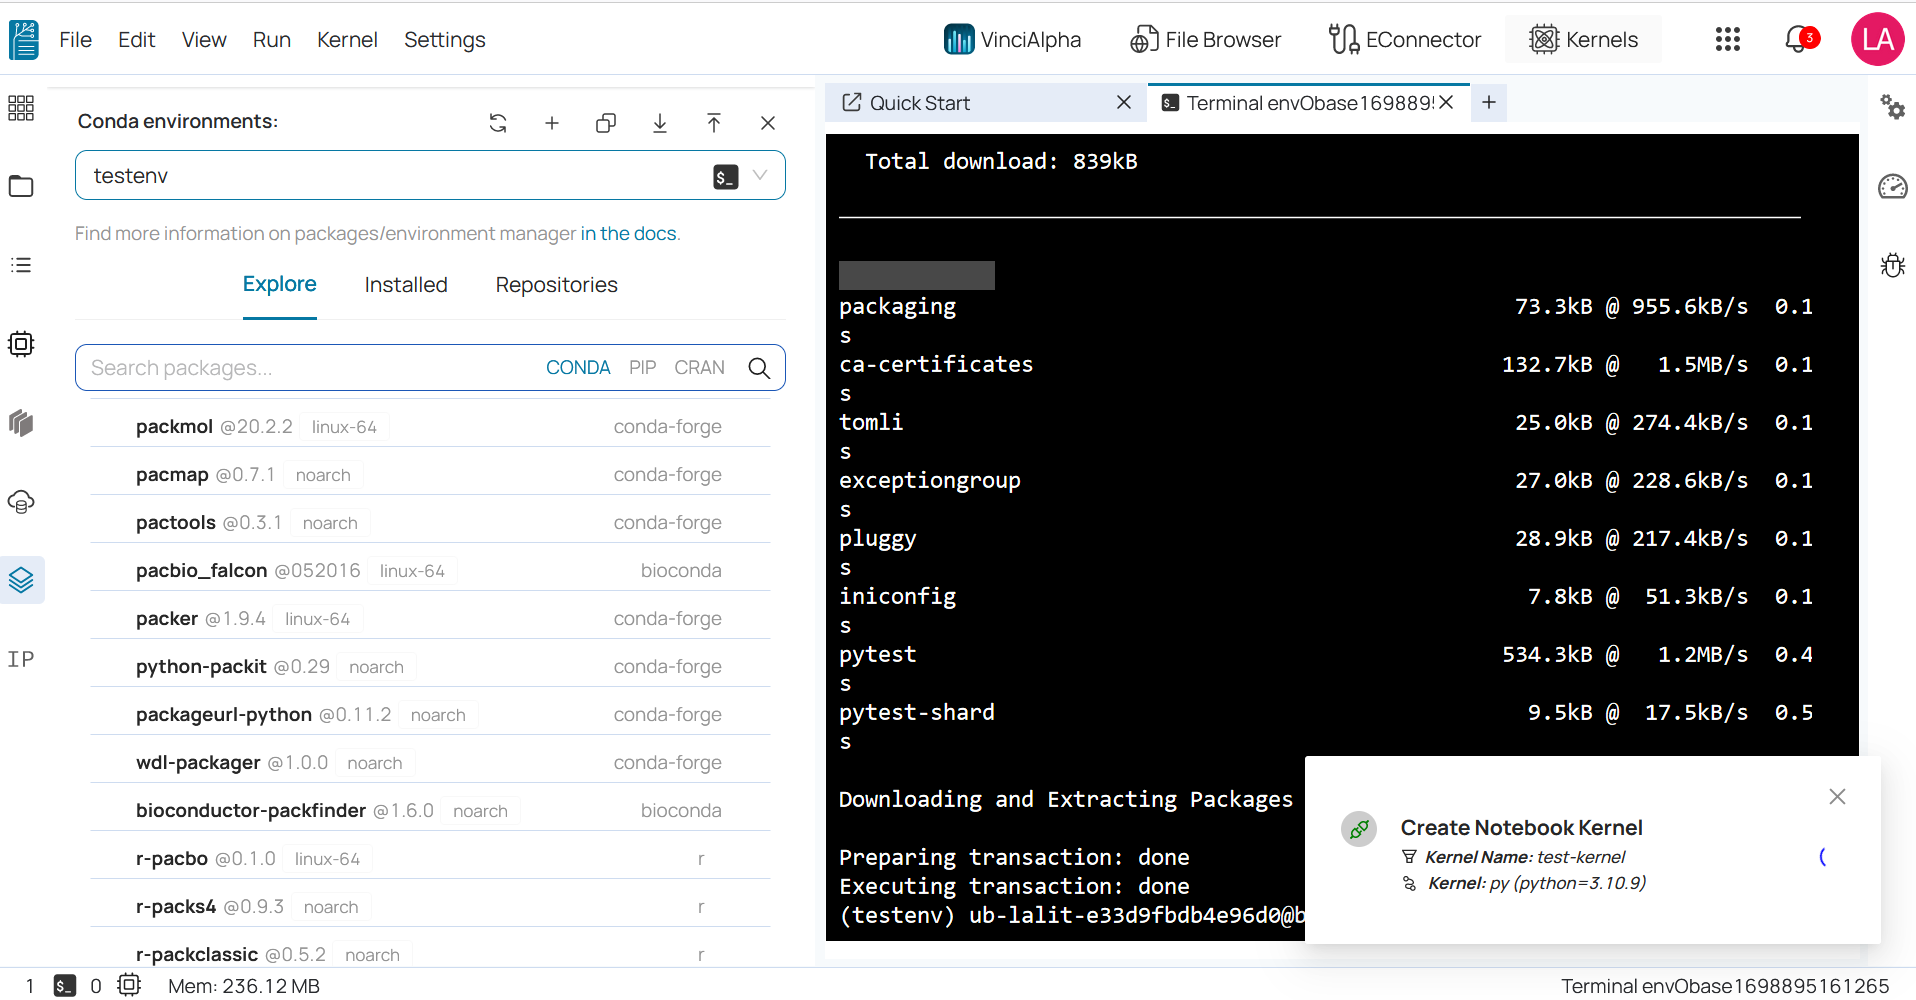
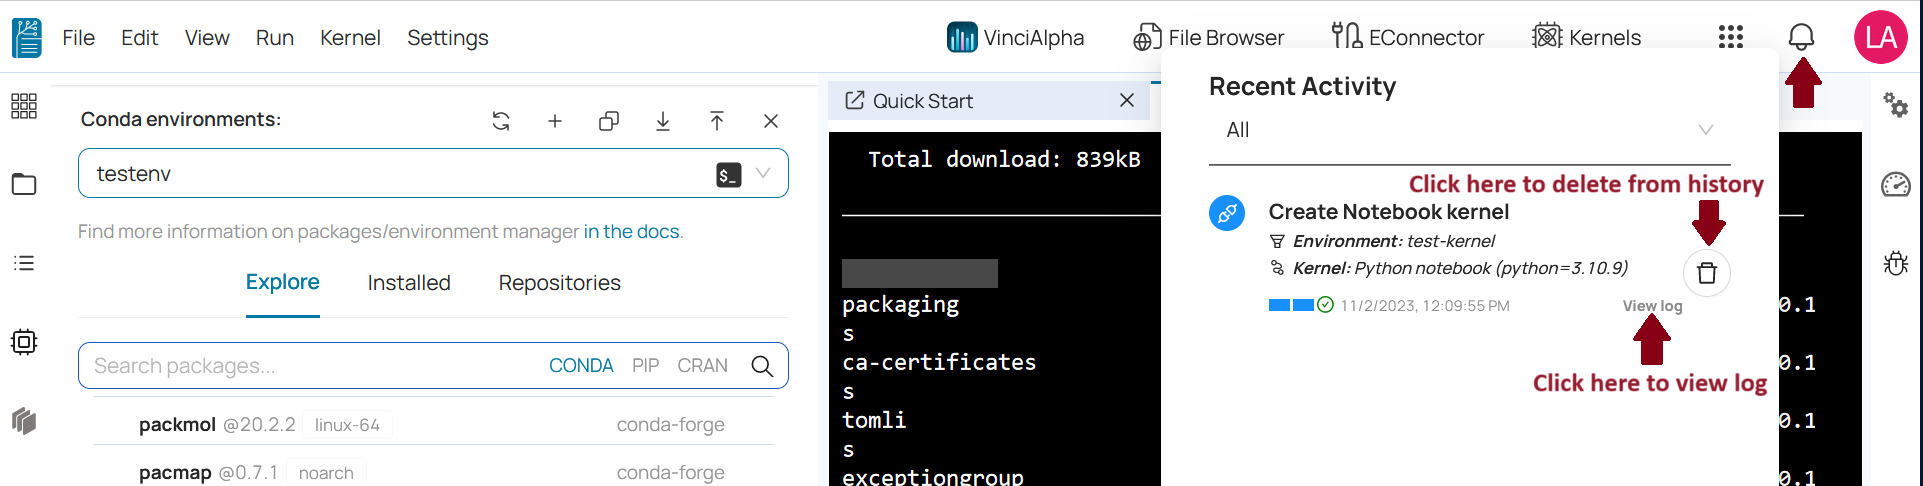
Once Kernel creation finished, It is also available Recent Activity popup. That can be view by clicking Notification icon (Top right bell icon).
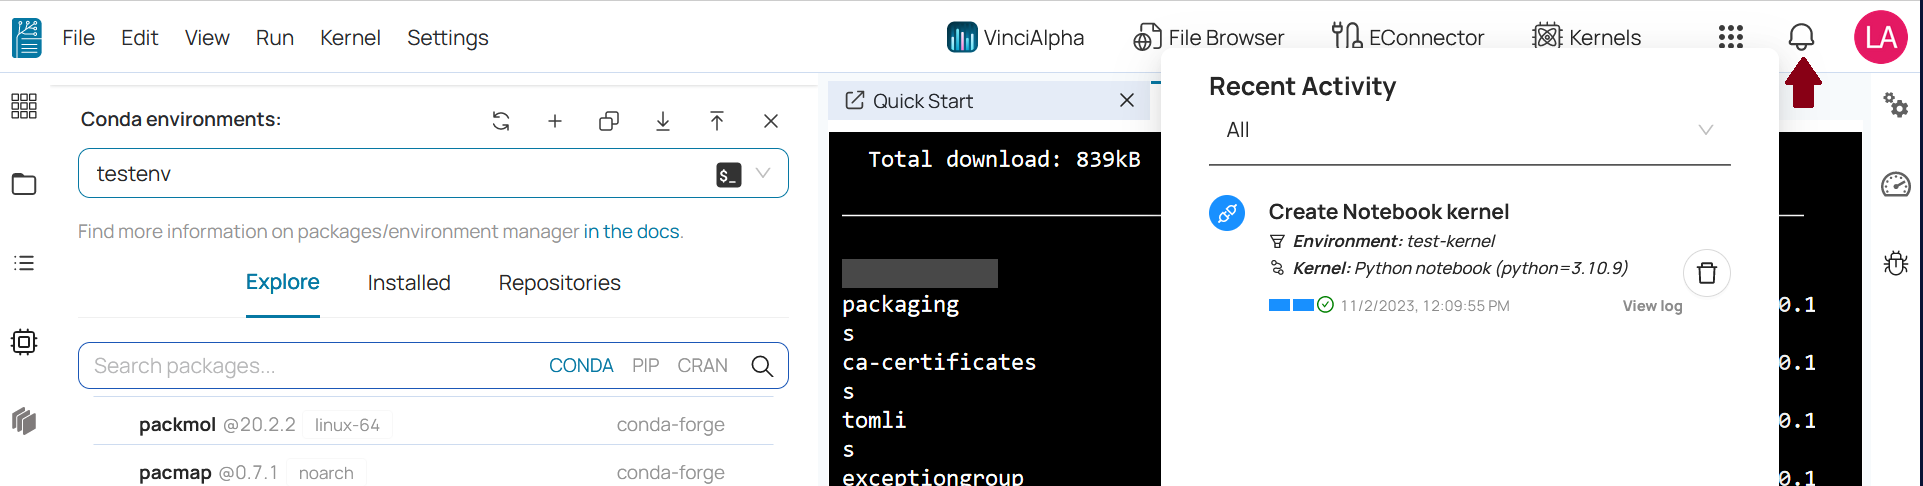
You can view the log to tracking the status.
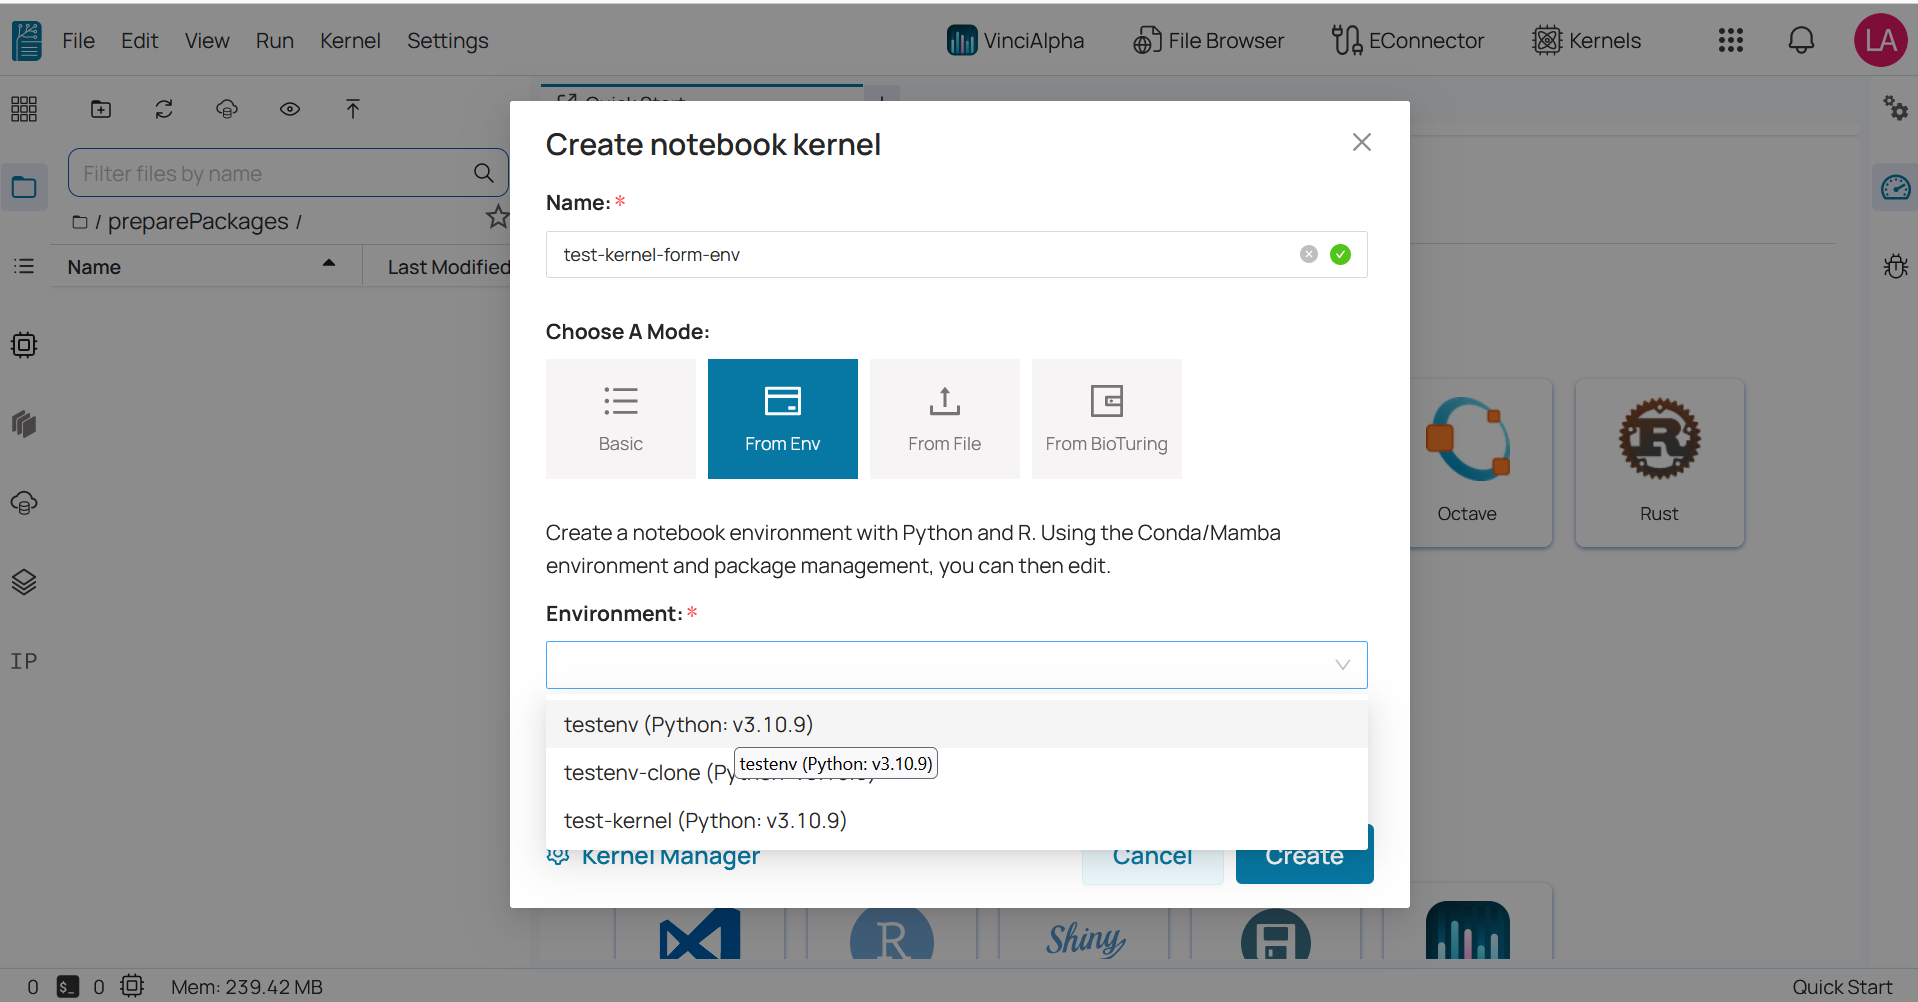
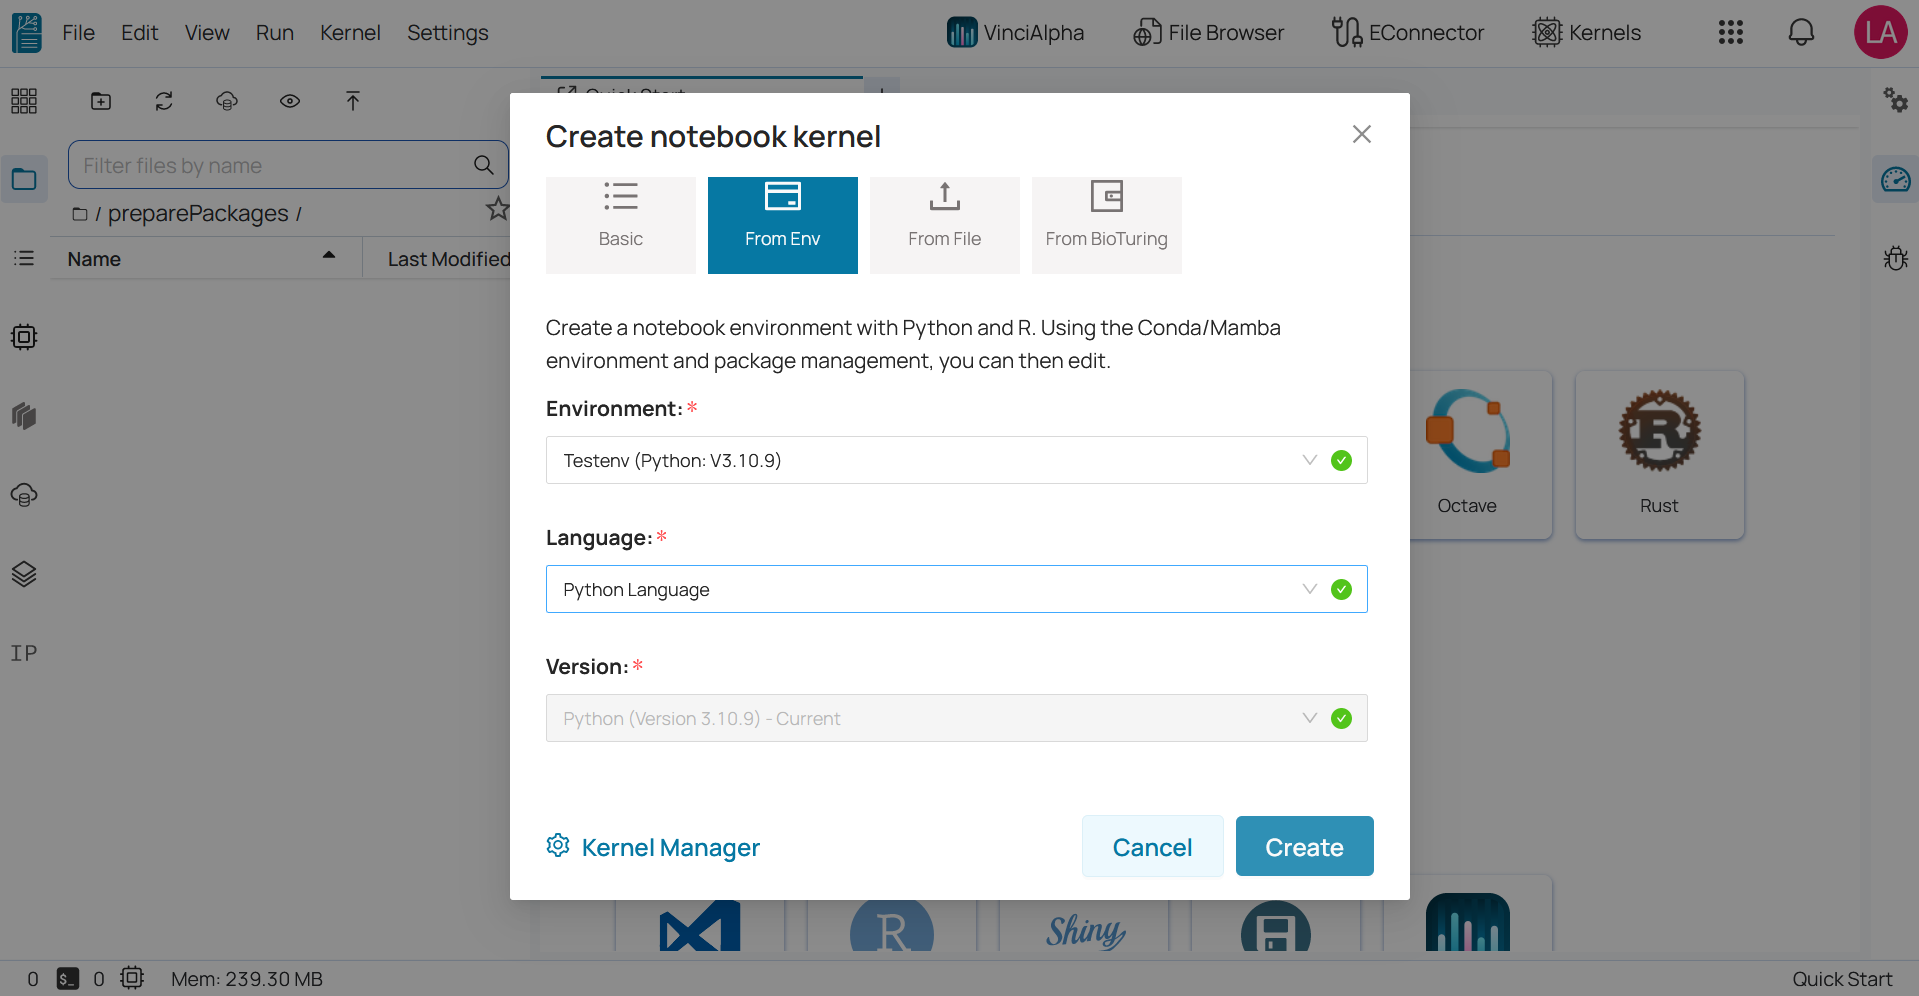
From Env Mode 
1️⃣ Enter the kernel name.
2️⃣ Choose A Mode: From Env. In this mode, create kernel using existing environment.
3️⃣ Select specific existing environment in environment field.
4️⃣ Select specific language in language field. Currently, BioStudio is only supporting two languages: Python and R.
5️⃣ Select version based on selected language.
🔔 Existing environment includes Python package and R package already. So the version field will be disabled and not allowed to be changed. But if you select a different language package that is not in the existing environment, then you are allowed to select the version. If pre-defined versions are not suitable for your requirements, you can type the version you would like to install, and then click the Add Customize button to apply.
🔆 Click Create button
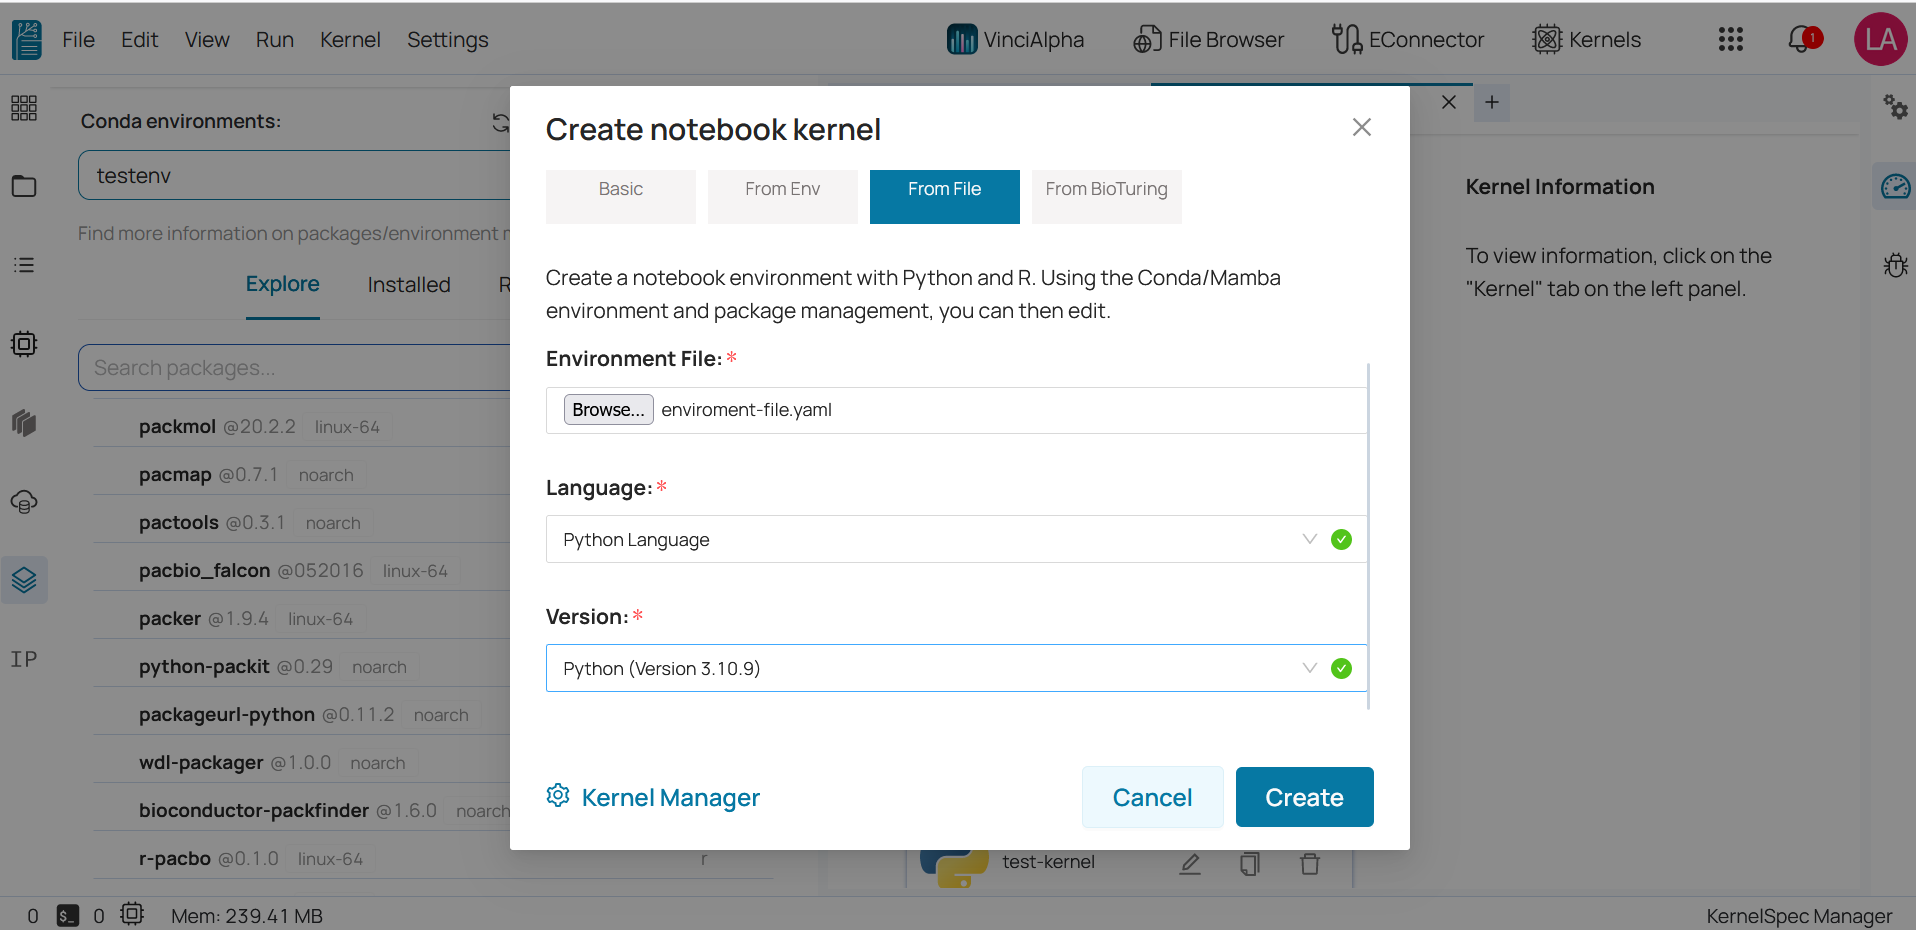
From File 
1️⃣ Enter the kernel name
2️⃣Choose A Mode: From File.
From File Mode first create an environment that would be from YAML file then it will install language that was selected during creation.
3️⃣ Upload environmental file by clicking Browse button.
4️⃣ Select specific language in language field. Currently, BioStudio is only supporting two languages: Python and R.
5️⃣ Select version based on selected language.
If pre-define versions is not suitable for your requirement, you can type version you would like to install, and then, click Add Customize button to apply.
🔆 Click Create button.
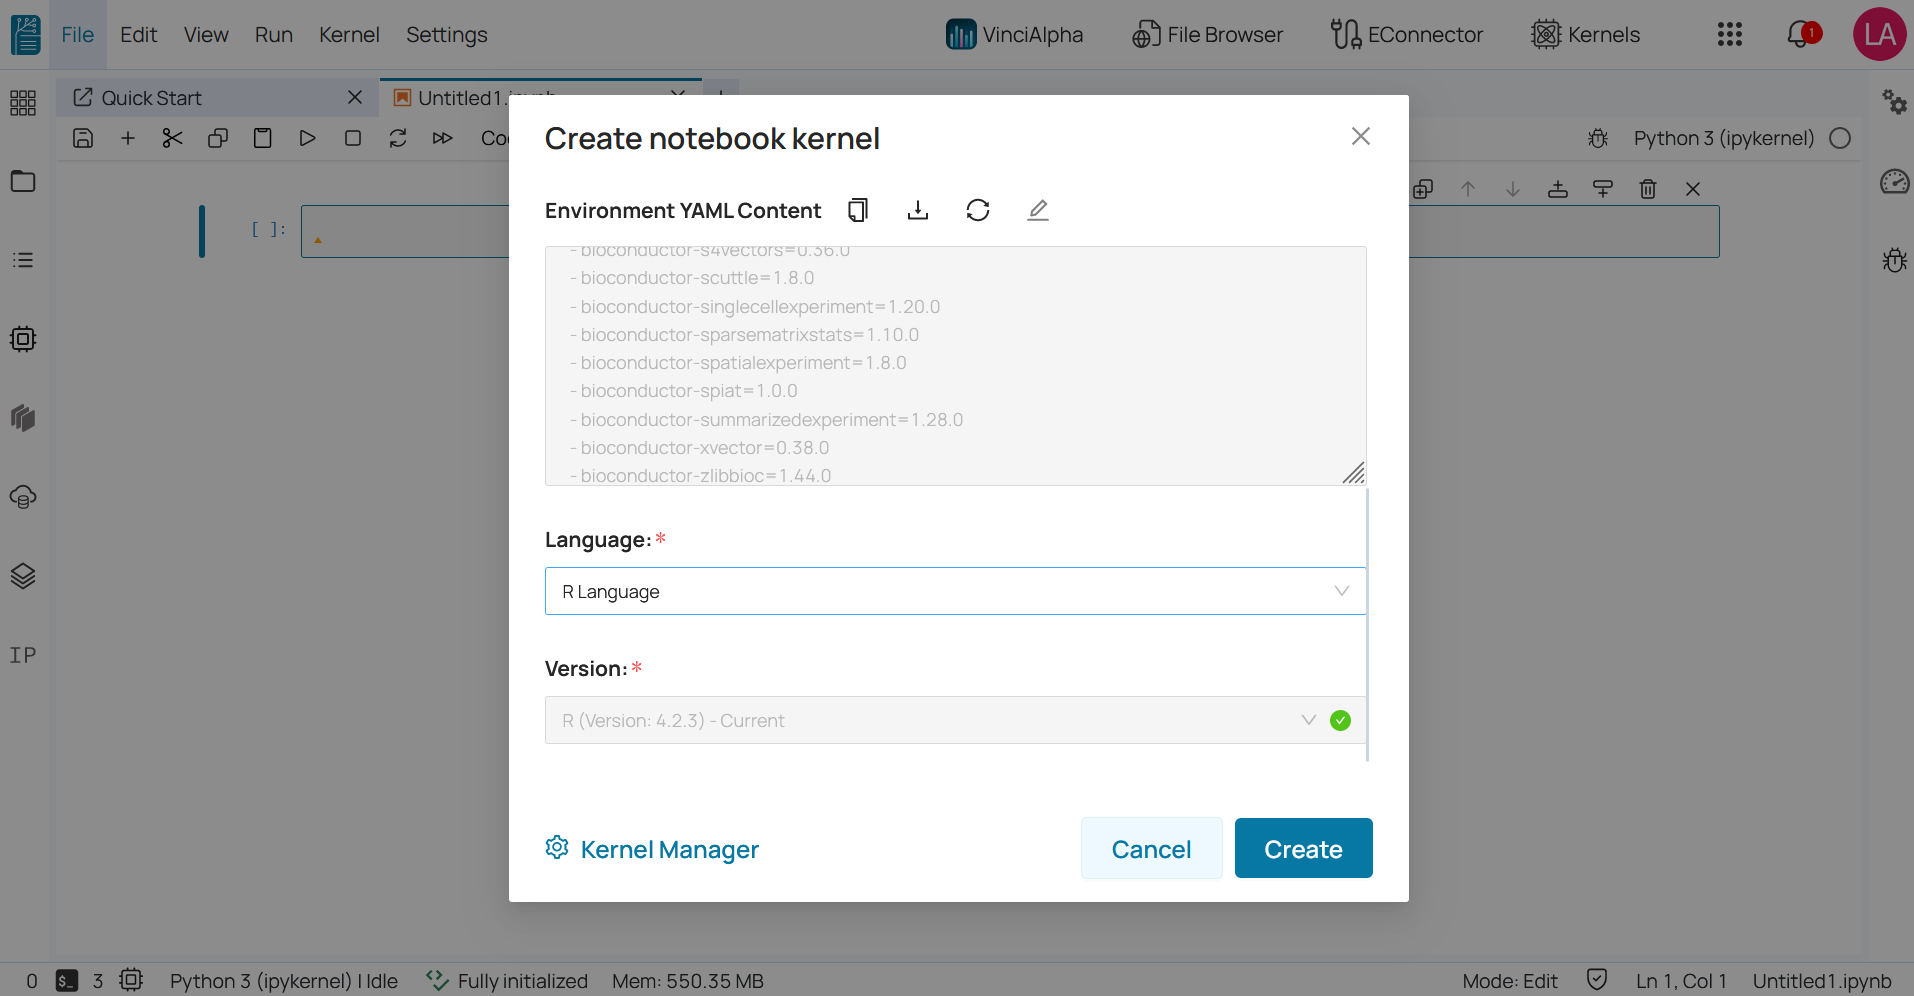
From BioTuring 
1️⃣ Enter the kernel name
2️⃣ Choose A Mode: From BioTuring.
From BioTuring option is similar to From File. But the environment will be delivered from BioTuring cloud which is requested environmental package from client.
3️⃣ Select your request environment from Your Request Environment. If you have nothing and would like to request something, you can click on Send us a request to request that BioTuring’s DataScience Team help you prepare your environment.
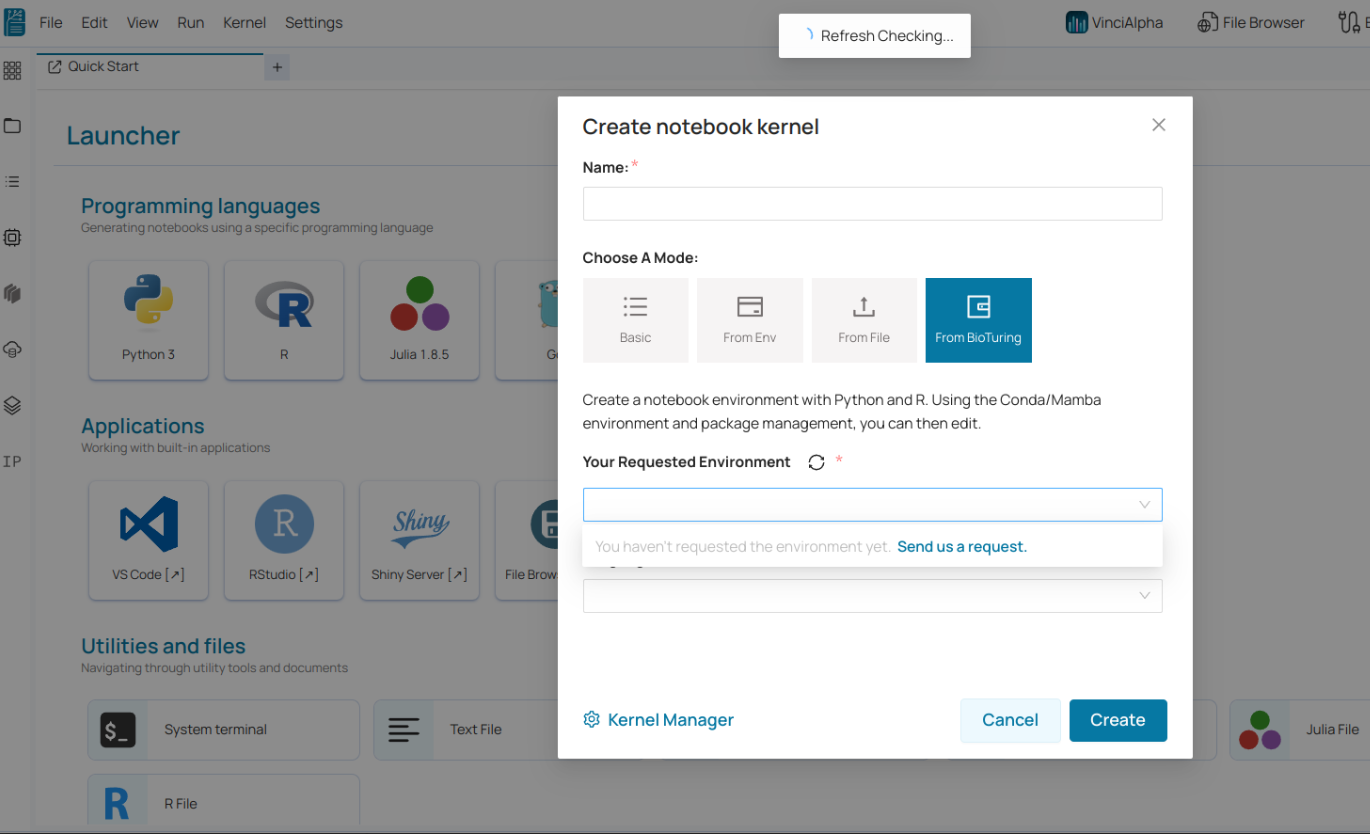

🔆 You can download or edit YAML file.
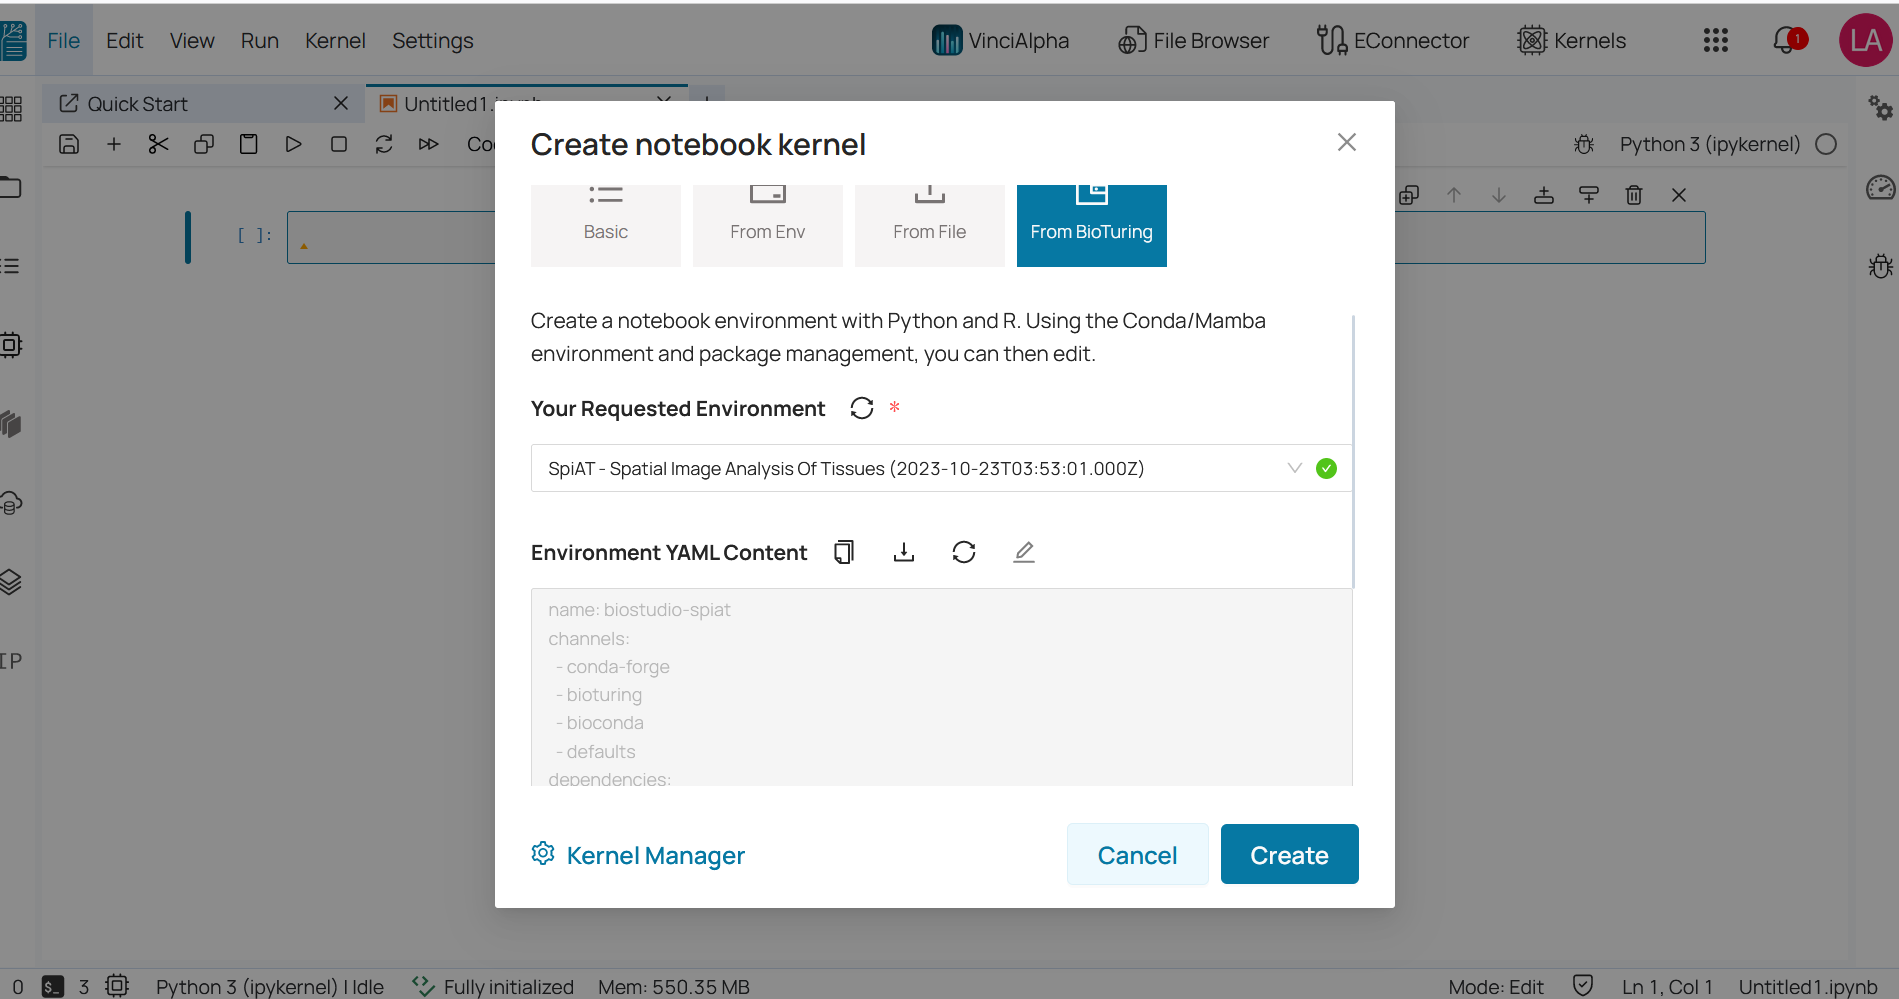
4️⃣ Select specific language in language field. Currently, BioStudio is only supporting two languages: Python and R.
5️⃣ Select version based on selected language.
🔔 Existing environment includes Python package and R package already. So the version field will be disabled and not allowed to be changed. But if you select a different language package that is not in the existing environment, then you are allowed to select the version. If pre-defined versions are not suitable for your requirements, you can type the version you would like to install, and then click the Add Customize button to apply.
6️⃣ Click Create button.
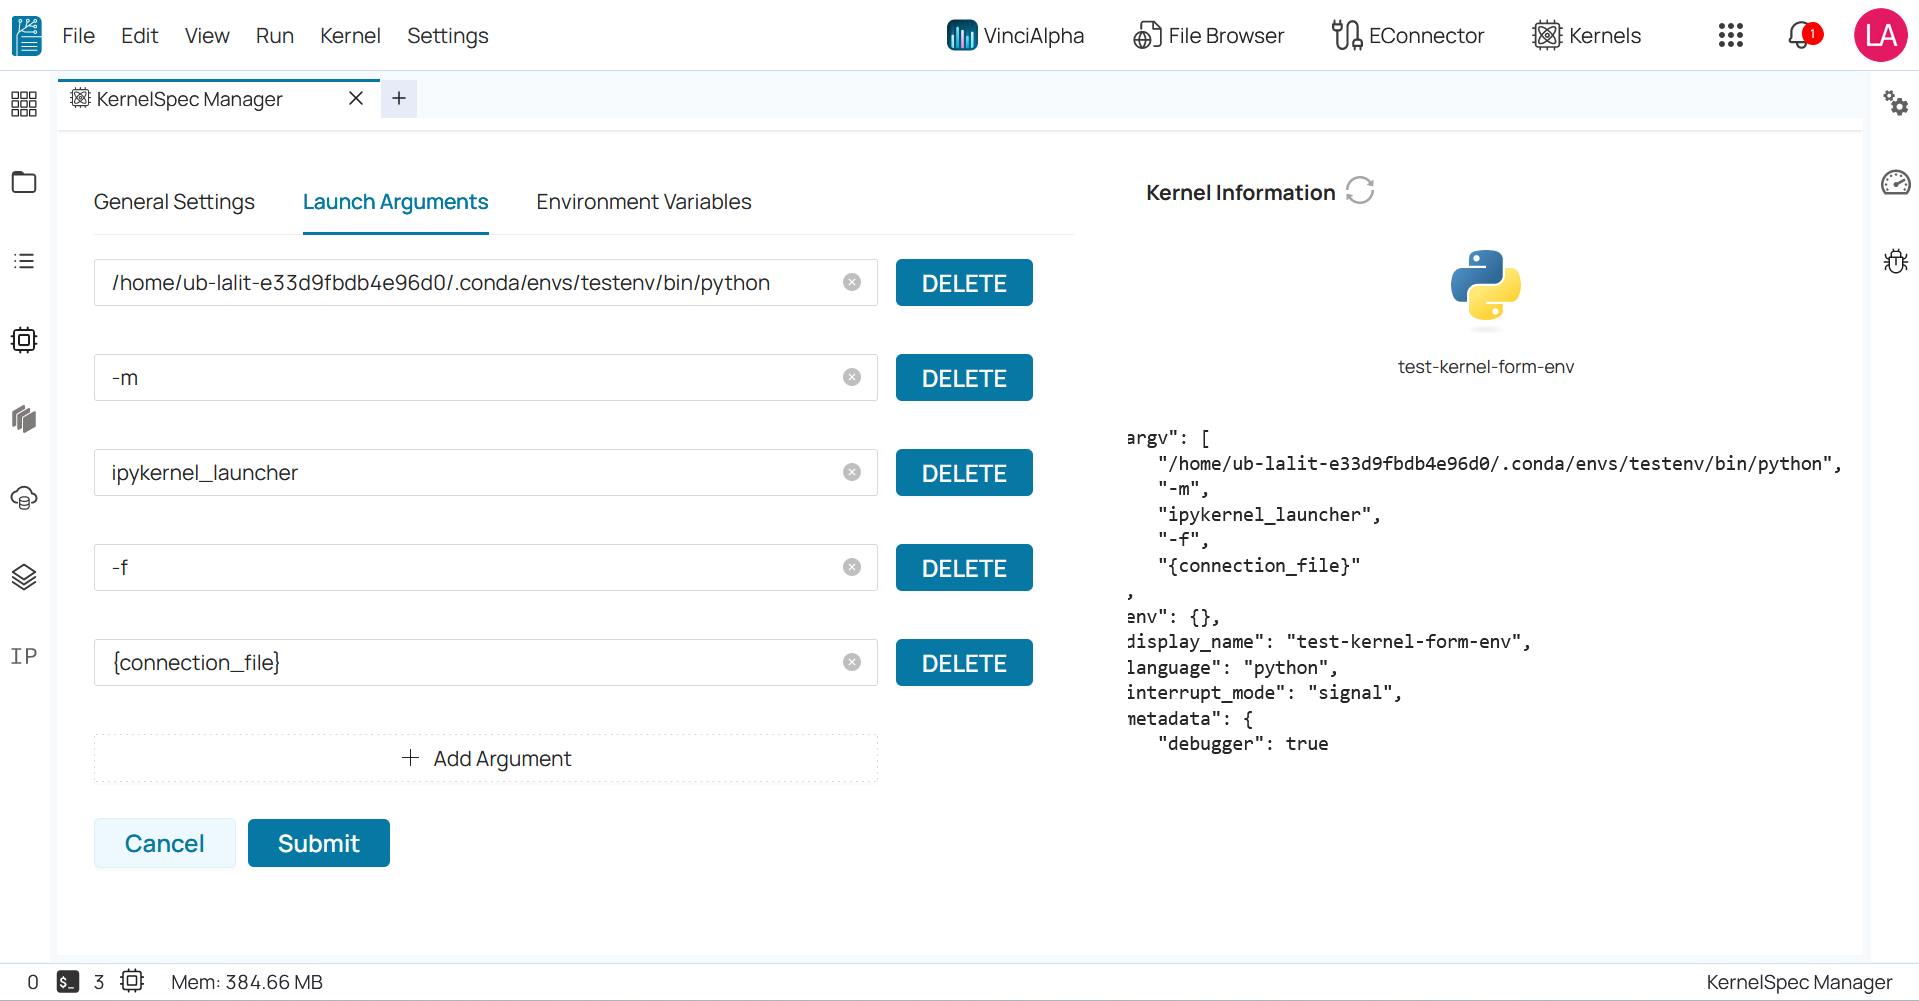
KernelSpec Manager 
🔆 Open kernel manager by clicking Kernel Manager in Create Notebook Kernel Popup.
– OR –
🔆 clicking on KernelSpec Manager icon in Quick Start Launcher.
KernelSpec Manager help you edit kernel specification like display name and some advance parameters. It includes:
🔆 User Kernels : List of the Kernels, which were created by user. User can edit and remove these kernel.
🔆 System Kernels : BioStudio pre-defines kernels. Which can be used to run a notebook. Users are not allowed to edit or remove these kernels, but they can be copied to user kernels.
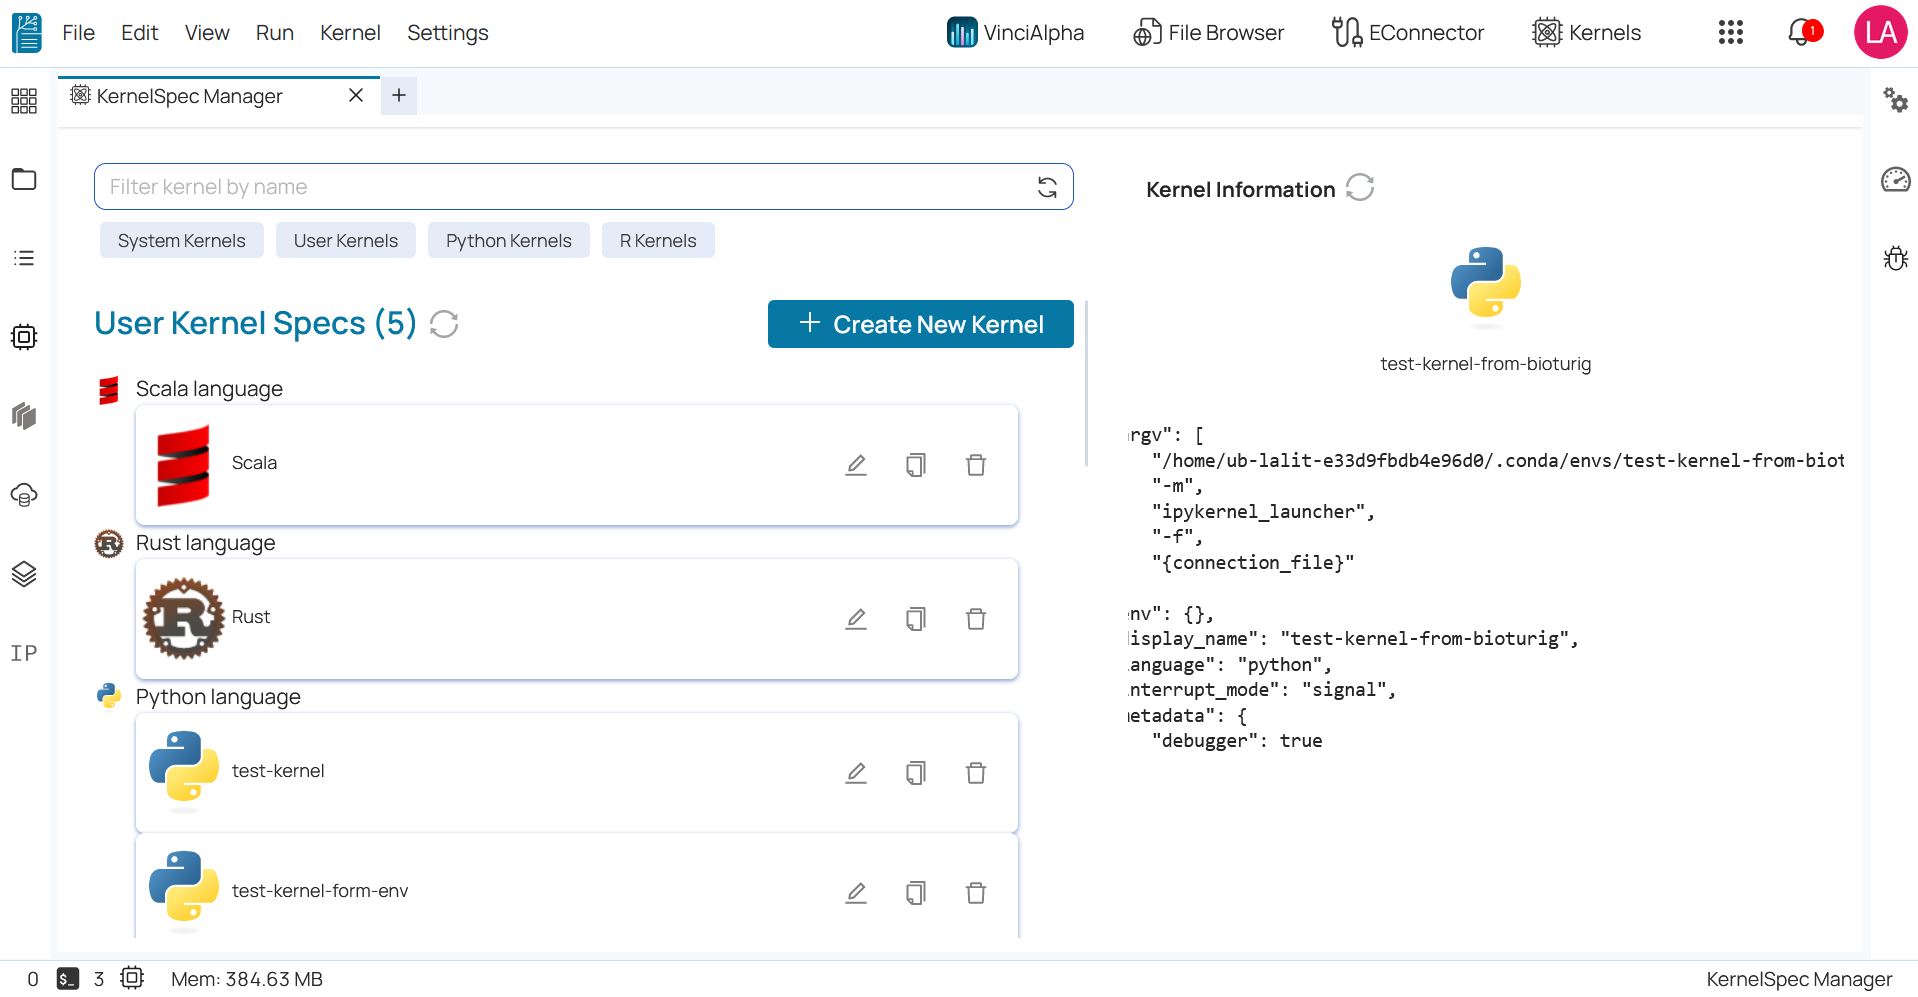
You can edit Kernel Launcher Arguments or add some environment variables as per your requirement.
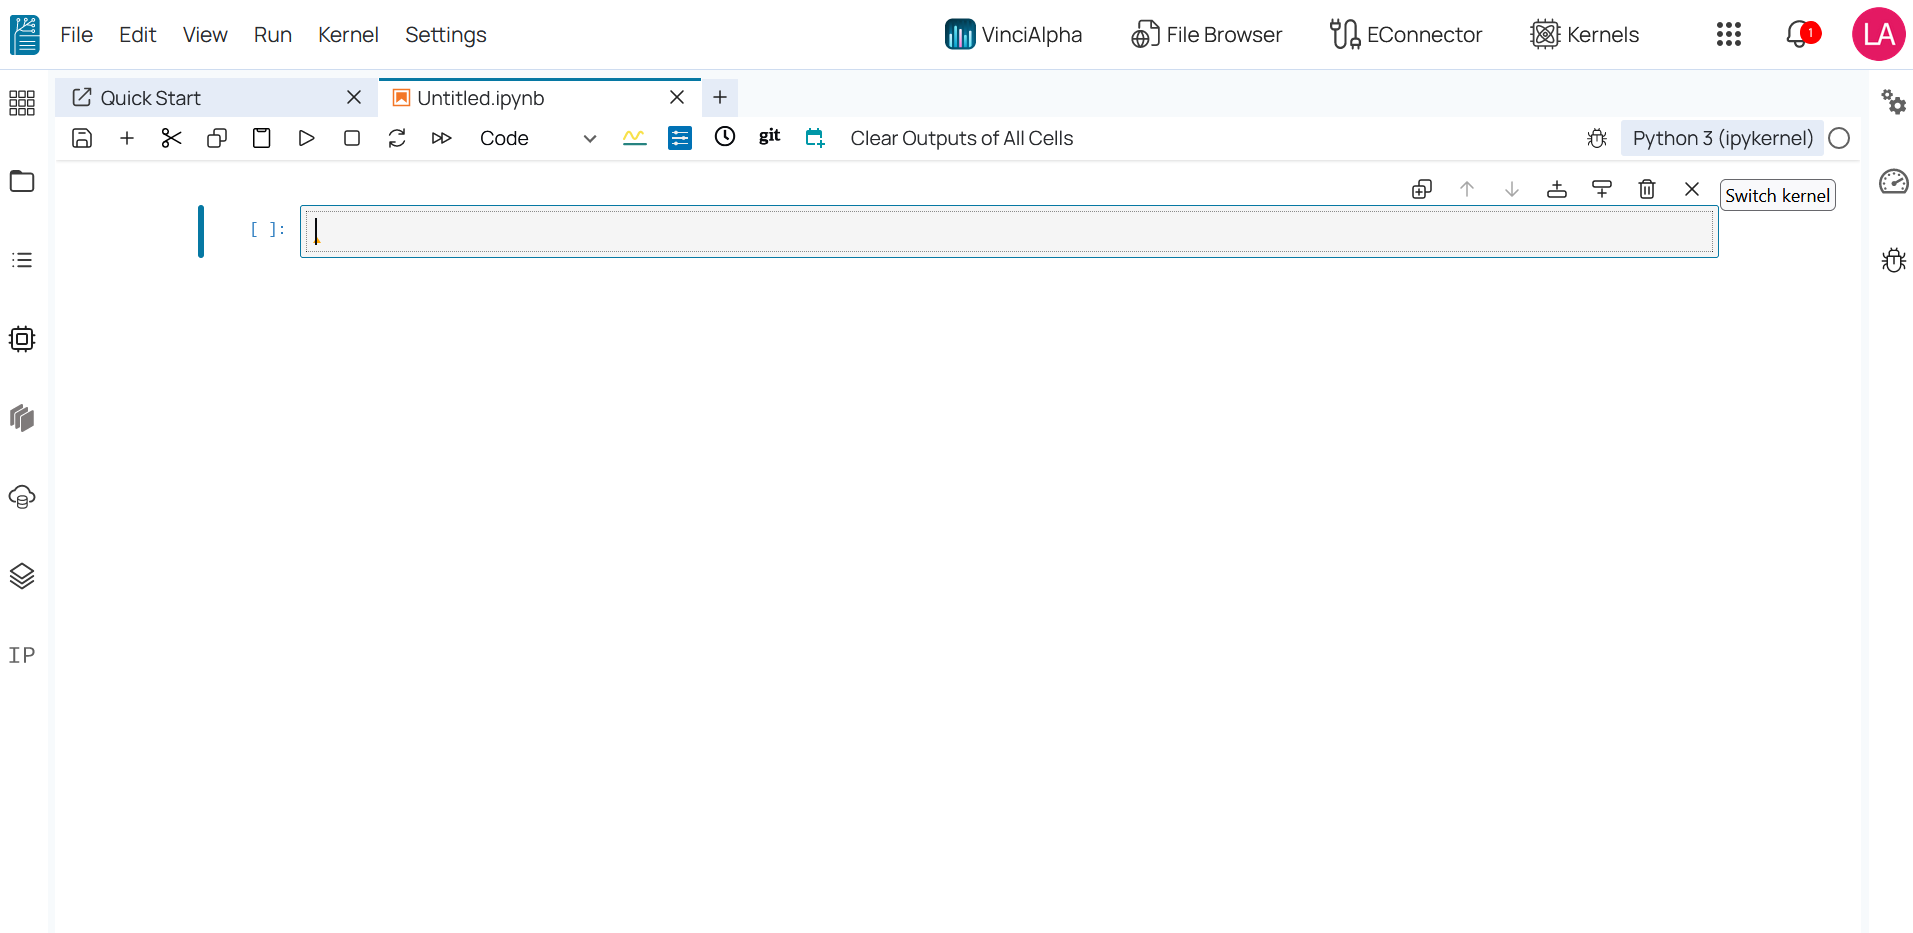
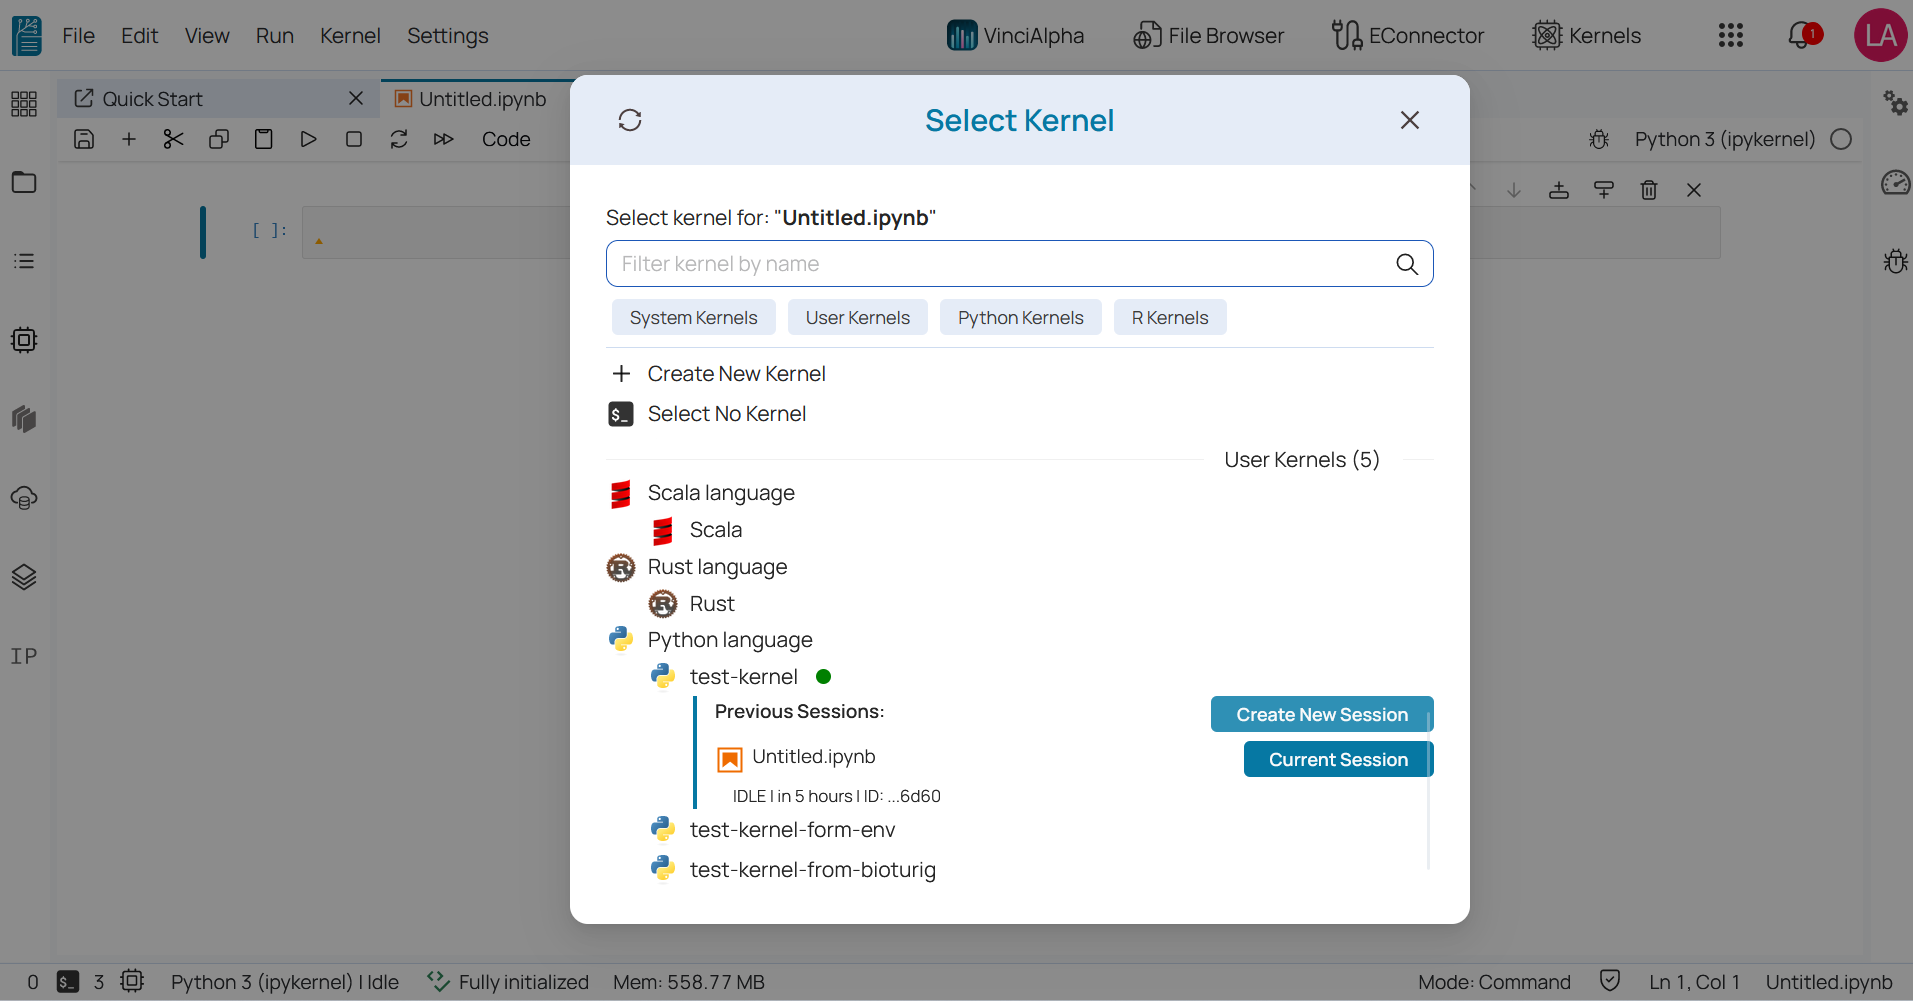
Connect notebook with kernel 
While run the notebook you can select Kernel by clicking switch kernel button.
🔆 Select Kernel popup will appear.
🔆 Select the kernel to which you would like to connect. If the kernel had a previous session, Then you will have two options.
🔆 Create a new session: Kernel will start from the beginning and does not have any old values for variables.
🔆 Current session: In this option, The notebook will run on the existing kernel and have all the available variables from the previous session.
For more information, please contact us at support@bioturing.com.